

Proofing Basket for Bread: A Baker’s Secret to Better Loaves
20-06-2025

Every artisan baker understands the importance of using the right proofing basket for bread. This humble tool plays a critical role in shaping and supporting dough during its final rise, helping bakers achieve loaves that are not only structurally sound but also visually stunning. From perfectly rounded boules to elongated batards, a proofing basket allows the dough to retain its form while developing a crisp crust and attractive surface patterns.
Rattan proofing baskets without liners have become the preferred choice for many bakers. They offer excellent breathability, draw moisture from the dough surface, and leave behind the iconic spiral imprint that defines artisan bread. These baskets are especially useful for high-hydration doughs, which can otherwise spread out and lose shape during fermentation.
This detailed guide explores everything you need to know about using a proofing basket for bread. You will learn about its function, how to choose the right size and shape, the best methods for preparing and maintaining your basket, and which bread recipes pair well with each type. Whether you are just beginning your baking journey or looking to refine your sourdough skills, this blog will help you bake with confidence and consistency. Let us begin by understanding what exactly a proofing basket is and why it matters.
What is a Proofing Basket?
A proofing basket, often referred to by its traditional names such as banneton or brotform, is a simple yet essential tool used during the final rise of bread dough. Its primary purpose is to support the dough’s shape as it proofs, especially for rustic breads like sourdough, which are shaped by hand rather than baked in pans.
Most commonly made from natural rattan, a proofing basket allows air to circulate around the dough. This encourages a thin, dry skin to form on the surface, which helps develop a better crust in the oven and enhances scoring definition. The spiral ridges inside the basket leave behind a beautiful pattern on the loaf, contributing to that artisanal appearance.
Unlike metal or plastic bowls, rattan baskets absorb excess moisture from the dough rather than trapping it. This not only improves texture but also helps prevent sticking, especially when dusted with flour. While some proofing baskets come with cloth liners, many bakers prefer to use them unlined for a more authentic crust and better fermentation control.
In essence, a proofing basket for bread does more than just hold dough. It shapes, strengthens, and readies your bread for baking, ensuring each loaf is consistent in structure and beautifully rustic in presentation.
Why You Need a Proofing Basket for Bread
When baking bread by hand, especially rustic styles like sourdough, maintaining the structure and appearance of the dough during the final rise is essential. A proofing basket for bread helps shape the dough, encourages proper fermentation, and leads to a more beautiful and consistent result. Beyond appearance, it also supports the dough’s texture, crust, and oven spring.
Here are the key reasons why a proofing basket is a must-have tool for artisan bread baking:
- Maintains shape and structure during final rise - Dough, especially high-hydration sourdough, tends to spread out if not properly supported. A proofing basket holds the dough in place, allowing it to rise upward instead of outward, resulting in a tall, well-shaped loaf.
- Improves crust development and texture - Rattan proofing baskets wick away surface moisture, forming a thin skin on the dough. This skin helps create a deep, golden crust with a crisp texture once baked, enhancing both the taste and appearance of the bread.
- Enhances scoring definition and oven spring - Because of the drier surface formed in the basket, cuts made with a blade before baking open up more cleanly. This leads to more controlled expansion in the oven, known as oven spring, and more dramatic scoring patterns.
- Encourages better fermentation through airflow - The breathable structure of rattan allows gentle airflow around the dough, supporting a more even fermentation process. This helps develop flavor and results in a better crumb structure with open, irregular holes typical of sourdough.
- Adds an artisan finish to your bread - The spiral pattern left by an unlined rattan basket gives the loaf a handcrafted, bakery-style look. It’s a small detail that makes a big visual impact and is loved by bakers and customers alike.
A proofing basket is more than just a shaping tool. It enhances the entire bread-making process, from fermentation to crust development. If you want your loaves to look and taste like they came from an artisan bakery, a well-chosen proofing basket for bread is an essential part of your baking toolkit.
Choosing the Right Size and Shape
Selecting the correct proofing basket begins with understanding the volume of your dough. While shape is a matter of style, matching your dough weight to the basket size ensures proper structure during the final rise. If the basket is too large, the dough will spread and flatten. If it is too small, it can overflow and lose form. A well-matched basket supports the dough gently and helps you achieve consistent results.
The easiest way to determine what size you need is to calculate your total dough weight. This includes flour, water, starter, salt, and any add-ins. Once you know the weight, refer to the size charts below to select the right basket in either round or oval shape.
Size Guide for Proofing Basket for Bread
| Dough Weight | Round Banneton (cm) | Oval Banneton (cm) |
|---|---|---|
| 100 g – 150 g | 12.7 cm | – |
| 150 g – 200 g | 15 cm | – |
| 300 g – 400 g | 18 cm | – |
| 350 g – 450 g | – | 20 cm |
| 450 g – 650 g | – | 23 cm |
| 650 g – 800 g | – | 25 cm |
| 700 g – 800 g | 20 cm | – |
| 750 g – 900 g | – | 28 cm |
| 800 g – 900 g | 23 cm | – |
| 900 g – 1000 g | 25.5 cm | – |
| 1000 g – 1200 g | 28 cm | – |
| 1100 g – 1400 g | – | 36 cm |
| 1200 g – 1500 g | 30.5 cm | – |
Matching dough weight to basket size prevents overproofing and collapse. It also improves the quality of your rise, makes scoring easier, and gives your loaf a well-shaped silhouette that bakes evenly. Whether you choose round or oval, getting the size right is one of the simplest ways to upgrade your baking results.
How to Use a Proofing Basket for Bread
Using a proofing basket for bread is an essential step that shapes the dough, enhances its final rise, and helps create a better crust. While it may look like a simple tool, how you prepare and handle it can significantly affect your baking results. The process includes properly flouring the basket, shaping the dough with tension, and managing the proofing time and temperature. Every detail contributes to the quality and structure of your bread.
Follow these key steps to use your basket effectively and get consistent results in every bake:
- Flour the basket thoroughly with the right type of flour
Before placing dough into the basket, always coat the interior with flour to prevent sticking. Rice flour is the preferred choice because it resists moisture and forms a barrier between the dough and the rattan surface. Use a fine sieve to evenly dust the bottom and sides, then gently press the flour into the basket with your hands or a dry brush. Avoid water or liners, especially if using an unlined rattan basket, as this interferes with airflow and prevents the dough from forming a dry outer layer during proofing. - Shape the dough tightly before transferring to the basket
Proper shaping is essential to help the dough hold its form while it rises. Round loaves should be folded inward and pulled into a tight ball with surface tension on the outside. For oval loaves, gently stretch the dough into a rectangular shape, fold it inward lengthwise, and seal the seam. Always place the dough seam side up in the basket so that the smooth side faces up when flipped out before baking. This positioning supports better scoring and oven rise. - Choose between room temperature and cold proofing
Once the dough is in the basket, you can either proof it at room temperature or refrigerate it for a cold fermentation. Cover the basket with a towel or place it in a food-safe plastic bag to prevent drying. Cold proofing slows down fermentation, enhances flavor, and makes the dough easier to handle during scoring. The choice depends on your baking schedule and desired flavor complexity, but both methods work well if timing and temperatures are managed carefully. - Turn the dough out gently for scoring and baking
After proofing is complete, the dough should be firm and slightly risen with visible bubbles beneath the surface. To remove it, place a sheet of parchment paper or a baking tray over the basket, then flip it gently. The dough should release easily if the basket was well prepared. Handle it carefully to maintain its shape, then score the surface using a bread lame or sharp blade before placing it in the oven. This final step helps control the direction of oven spring and gives your bread its finished look.
Learning how to use a proofing basket for bread takes a bit of practice, but once you master it, the results are consistently impressive. A well-proofed loaf has structure, rise, and character, and it all begins with the way you handle your dough in the basket. With proper flouring, shaping, and proofing, your bread will not only taste better but also look like it came straight from a professional bakery.
Common Mistakes to Avoid
A proofing basket for bread is a simple yet powerful tool. However, even small oversights in its use can affect the quality of your final loaf. From improper preparation to mismatched sizing, mistakes can cause dough to stick, flatten, or lose structure. Knowing what to avoid ensures a smoother baking experience and more consistent results.
Below are the most common mistakes bakers make when using a proofing basket, along with tips to avoid them:
- Insufficient flouring : Applying too little flour or using only all-purpose flour often leads to sticking. This can damage the surface of the dough when it is turned out. Rice flour, or a blend of rice and wheat flour, stays dry and creates a better non-stick barrier. Dust the basket thoroughly and press the flour into the rattan so it adheres well.
- Weak dough shaping : Dough needs proper shaping before being placed in the basket. If the dough lacks surface tension, it will spread out during proofing and collapse in the oven. Round loaves should be formed into tight balls, and batards should be folded evenly with a sealed seam. This step helps the dough hold its shape and improve oven rise.
- Wrong basket size : Using a basket that does not match the volume of your dough can result in flat or misshapen loaves. If the basket is too small, the dough may rise unevenly and spill over. If it is too large, the dough will not rise upward and can spread out too much. Always estimate your dough weight and match it to the right basket size.
- Incorrect proofing time : Overproofing makes dough too fragile to handle, while underproofing results in a dense loaf with limited rise. Timing the proof is essential. Use the fingertip test to gauge readiness. If the dough springs back slowly but leaves a slight impression, it is properly proofed and ready to bake.
- Rough dough handling : Once the dough is ready, turning it out of the basket must be done gently. Rough handling can deflate the dough or disturb its surface. Invert the dough smoothly onto parchment or a baking surface while supporting it from below. A gentle release preserves the structure and improves the scoring result.
By paying close attention to these details, you can avoid common setbacks and make better use of your proofing basket. With consistent practice, these small adjustments will lead to better texture, improved shape, and more visually appealing artisan loaves.
Shaping and Baking: Tools That Work Together
In artisan bread baking, the proofing basket and the Dutch oven serve as two essential tools that work in harmony. Each plays a unique role at a different stage of the process. One supports the dough before baking, the other enhances the final result in the oven. When used together, they help create loaves that are both beautiful and professional in quality.
- Supports the rise : The proofing basket holds the shaped dough during its final fermentation. It supports the loaf’s structure, especially for high-hydration doughs, and prevents spreading. The rattan surface allows airflow, helps develop a dry skin, and prepares the dough for clean scoring.
- Controls the steam : A Dutch oven provides the ideal baking chamber. It traps steam released from the dough, keeping the crust soft during the early baking stage. This encourages maximum oven spring. Later, the crust sets and turns golden when the lid is removed.
- Works together : These tools are not alternatives but a perfect pair. The proofing basket gives shape and definition. The Dutch oven ensures proper baking conditions. Together, they help bakers achieve consistent rise, open crumb, and a crisp, glossy crust.
Used in the right sequence, the proofing basket shapes the loaf while the Dutch oven helps it reach its full potential. This combination transforms everyday baking into something truly artisanal, delivering results that stand out both in appearance and taste.
Our Top-Selling Rattan Proofing Baskets
Choosing the right proofing basket can greatly influence your bread’s shape, rise, and finish. At Bakerykart, we offer a curated range of high-quality rattan proofing baskets trusted by both home and professional bakers. These baskets are made from natural cane, free from chemicals, and handcrafted to support smooth fermentation. Below are our most popular models, each suited to different dough weights and baking preferences.
-

15 cm Round Banneton Basket
The 15 cm Round Banneton Basket is a compact and reliable choice for shaping small sourdough boules. Designed for up to 300 grams of dough, it is perfect for single-serve loaves and test bakes. The natural rattan coils promote surface drying and leave a distinct flour ring pattern. Ideal for home bakers looking for faster proofing times, tighter crumb, and more control over smaller batch sizes.
-

18 cm Round Banneton Basket
Made to hold up to 400 grams of dough, the 18 cm Round Banneton Basket helps shape medium-sized boules with ease. Its breathable rattan structure encourages uniform proofing and creates a beautiful natural imprint. This basket is ideal for artisan-style sourdough lovers who prefer controlled hydration and moderate loaf sizes that deliver impressive crust and scoring in a compact format for everyday baking.
-

20 cm Round Banneton Basket
Suited for loaves weighing around 500 grams, the 20 cm Round Banneton Basket offers structure and support for classic sourdough boules. The shape encourages vertical rise while maintaining round edges and deep scoring. Its unlined rattan design absorbs excess moisture to enhance crust quality. Ideal for bakers seeking a balance between volume, shape retention, and visual presentation in rustic home-style baking.
-

20 cm Oval Banneton Proofing Basket
The 20 cm Oval Banneton Basket comfortably holds 500 grams of dough, making it ideal for shaping batards or elongated loaves. Its oval form supports the dough’s structure while the natural rattan helps create a dry surface and uniform crust. A favorite among sourdough enthusiasts, this basket makes it easy to shape, score, and bake artisan batards with character and consistency.
-

22 cm Oval Banneton Proofing Basket
This 22 cm Oval Banneton Basket is ideal for dough weights around 600 grams. It allows your batard to rise evenly while preserving a defined structure and surface for scoring. The breathable rattan helps draw out surface moisture, supporting crust development. Perfect for long-ferment sourdough or rye loaves, this basket is a reliable tool for consistent shaping and elegant presentation.
-

25 cm Oval Bread Proofing Basket
The 25 cm Oval Banneton Basket is crafted for larger loaves of up to 800 grams. Its elongated build supports a well-shaped batard and maintains structure during the final rise. The rattan material ensures better crust by allowing airflow and moisture absorption. Ideal for weekend baking or larger portions, this basket offers consistent shaping with reliable fermentation support.
These top-selling proofing baskets are built to enhance your baking experience and bring structure to your dough. Whether you are working with a small starter or preparing a large loaf, choosing the right size and shape helps ensure that each bake is a success from rise to crust.
Bread Recipes to Try with a Proofing Basket
Using the right recipe with the right proofing basket brings out the full potential of artisan bread baking. Below are five well-tested recipes paired with suitable proofing basket sizes from our best-selling range. Each recipe is crafted to help you master shaping, fermentation, and baking with confidence.
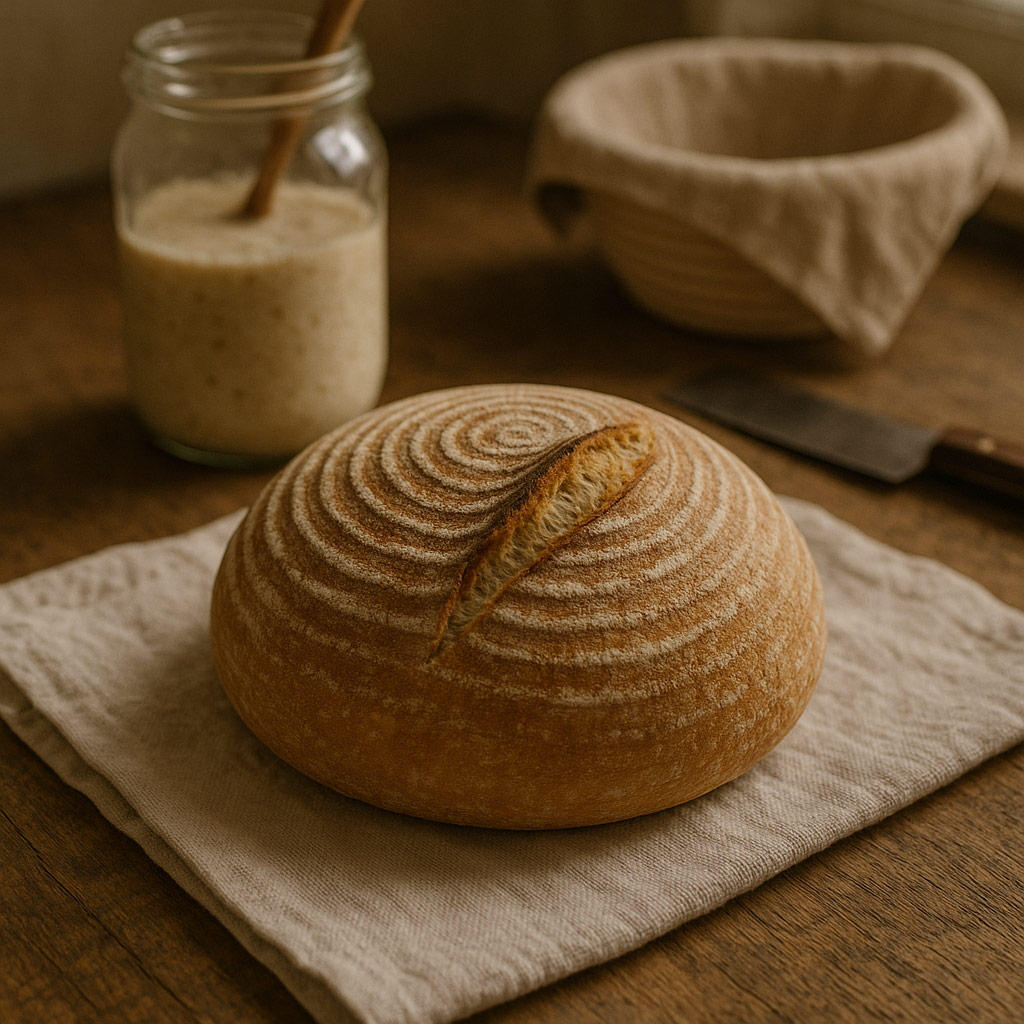
Classic Sourdough Boule
This timeless sourdough boule is loved for its crisp crust, chewy crumb, and mild tang. It is a versatile base for experimenting with flavors and flours. Shaped in a 20 cm Round Banneton Basket, it develops a well-defined dome and beautiful spiral imprint. Ideal for both new and experienced bakers looking to perfect their everyday sourdough with a reliable rise and structured bake.
Ingredients:
- 500 grams bread flour
- 350 grams water
- 100 grams active sourdough starter
- 10 grams salt
Step-by-Step Instructions:
- Mix flour and water in a large bowl and let it rest for 1 hour to allow gluten to develop naturally.
- Add the sourdough starter and salt, then mix thoroughly by hand or using a dough scraper.
- Over the next 3 hours, perform four sets of stretch and folds at 30-minute intervals to build structure.
- Lightly flour the proofing basket. Shape the dough into a tight round, place it seam side up in the basket, and cover.
- Cold proof overnight in the refrigerator or allow to rise at room temperature for 4 to 5 hours until puffed and elastic.
- Gently turn the dough out onto parchment, score the top, and bake at 230°C in a Dutch oven for 20 minutes covered and another 20 minutes uncovered.
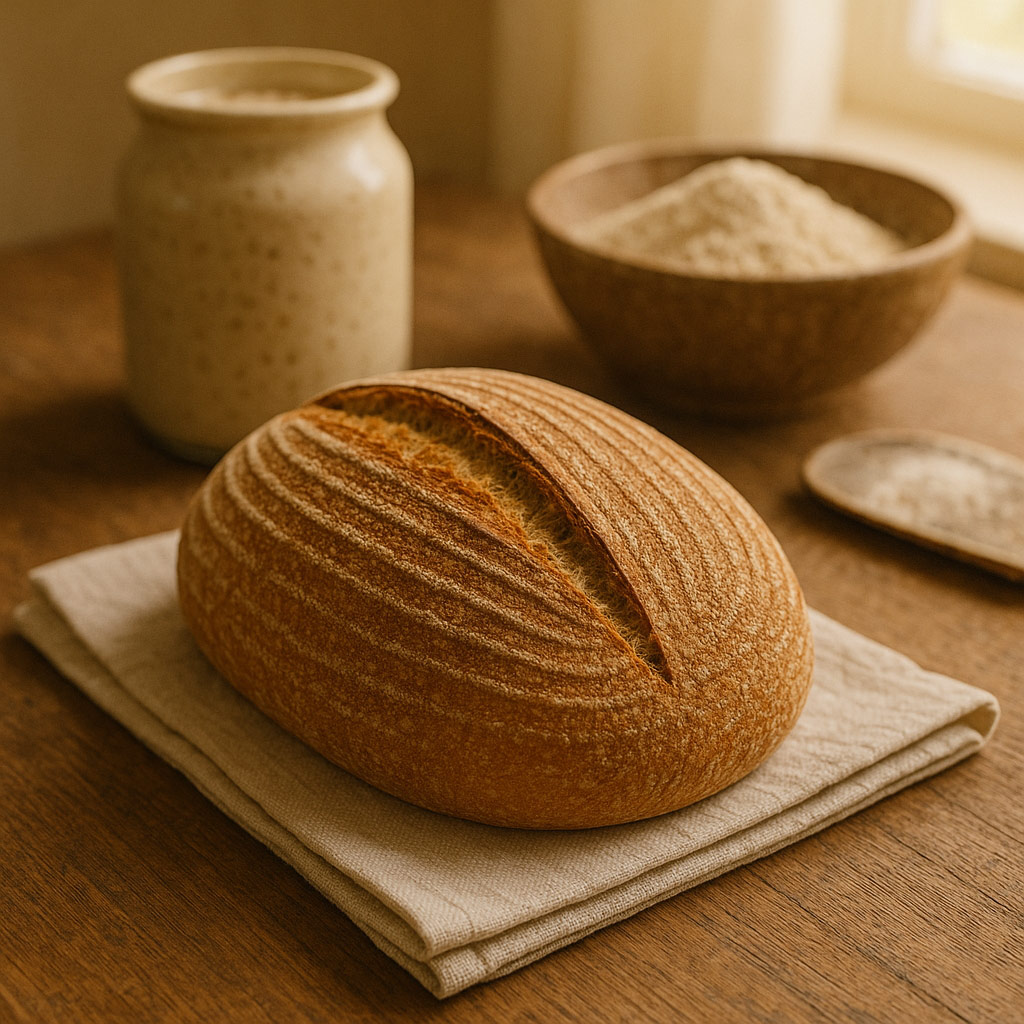
Whole Wheat Country Loaf
This hearty country-style loaf balances whole wheat’s rich flavor with the strength of bread flour. It yields a chewy, flavorful interior and a bold crust. The 22 cm Oval Banneton Basket provides a supportive structure during proofing, resulting in a beautifully curved batard. This recipe is great for bakers who want a rustic and nutritious loaf with an artisanal feel.
Ingredients:
- 300 grams whole wheat flour
- 200 grams bread flour
- 350 grams water
- 100 grams sourdough starter
- 10 grams salt
- 1 tablespoon honey
Step-by-Step Instructions:
- Combine all ingredients and mix until a shaggy dough forms. Rest for 45 minutes to allow the flour to absorb moisture.
- Knead the dough gently until smooth or perform three sets of stretch and folds spaced 30 minutes apart.
- Shape the dough into a batard by folding it lengthwise and tucking the sides under. Place seam side up in a floured oval basket.
- Cover with a cloth and proof at room temperature for 5 hours or refrigerate overnight for added flavor.
- Flip the dough onto a tray, score with a long central slash, and bake at 220°C for 45 minutes using steam in the first 20 minutes.
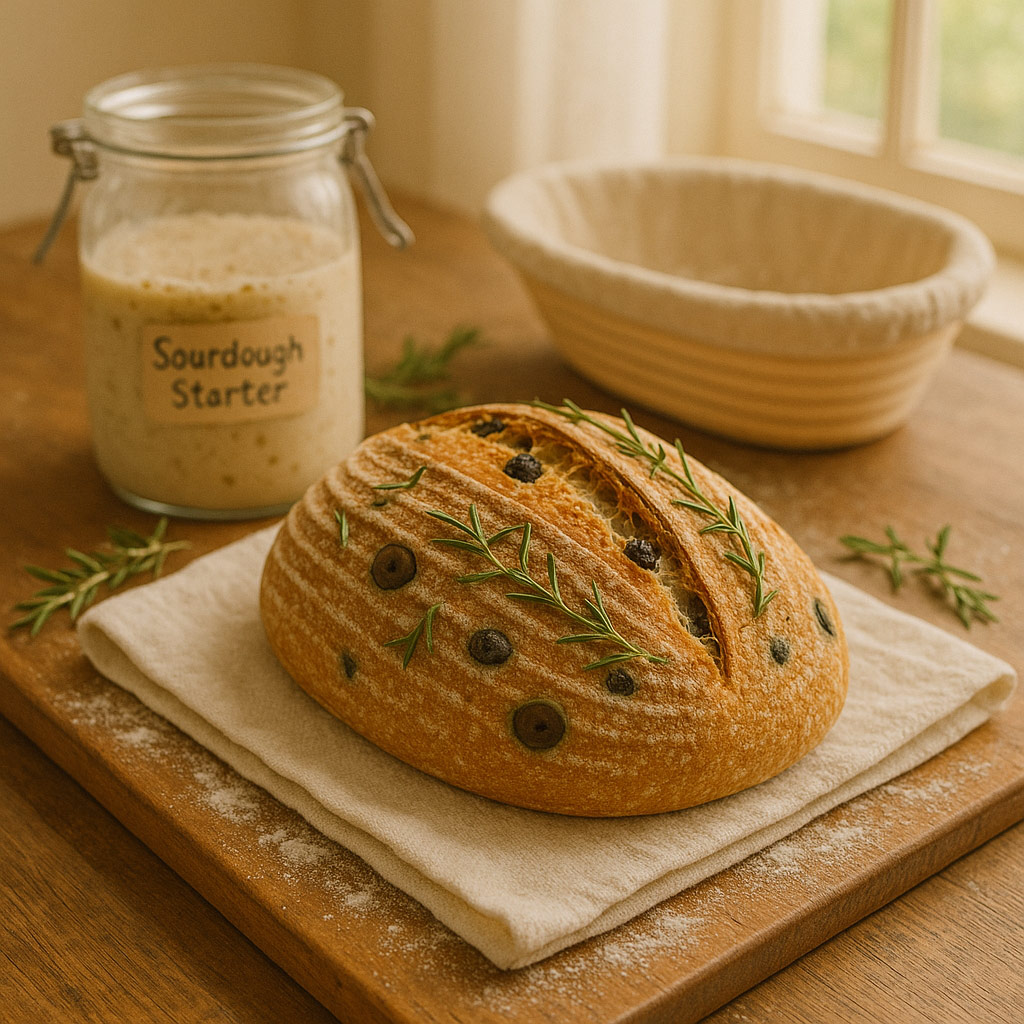
Olive and Herb Batard
This flavorful sourdough batard is infused with the briny richness of black olives and the earthy aroma of rosemary. The 25 cm Oval Banneton Basket offers ample room for shaping and supports the batard as it rises. The combination of savory ingredients and open crumb makes this an excellent loaf for slicing and pairing with soups, cheese boards, or olive oil dips.
Ingredients:
- 450 grams bread flour
- 300 grams water
- 100 grams active sourdough starter
- 10 grams salt
- 70 grams sliced black olives
- 1 tablespoon fresh chopped rosemary
Step-by-Step Instructions:
- Mix flour, water, and starter until incorporated. Rest for 30 minutes for autolysis.
- Add salt, olives, and rosemary. Fold gently to distribute evenly without tearing the dough.
- Over the next 2.5 hours, complete three sets of stretch and folds every 45 minutes.
- Shape into a tight batard and place seam side up in a floured oval basket.
- Cover and proof at room temperature for 4 to 6 hours, or refrigerate overnight.
- Score with multiple diagonal cuts and bake at 230°C with steam for 20 minutes covered and 25 minutes uncovered.
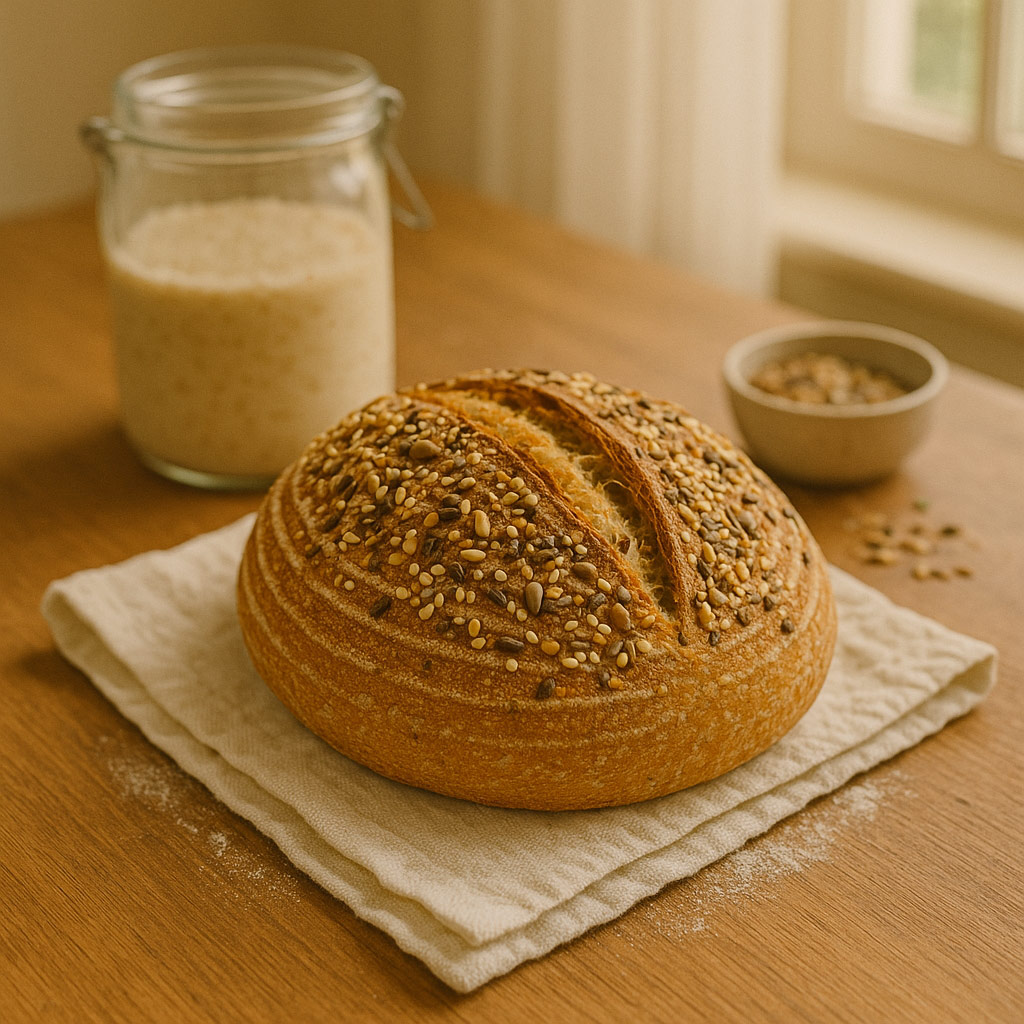
Seeded Multigrain Round
A crusty sourdough loaf enriched with hearty grains and seeds, this recipe is full of texture and nutrition. The 18 cm Round Banneton Basket provides just enough structure for a medium boule while keeping a compact shape. This is an excellent choice for everyday baking and delivers a nutty flavor with a crackling seeded crust.
Ingredients:
- 400 grams bread flour
- 100 grams whole wheat flour
- 350 grams water
- 100 grams sourdough starter
- 10 grams salt
- 50 grams mixed seeds (sunflower, flax, sesame)
Step-by-Step Instructions:
- Mix all ingredients into a shaggy dough. Let it rest for 30 minutes.
- Knead or fold the dough, then perform three stretch and folds spaced 30 minutes apart.
- Shape into a round and roll the top in a tray of seeds.
- Place seam side up in a well-floured 18 cm round basket and cover.
- Proof at room temperature for 5 to 6 hours or refrigerate overnight.
- Bake at 230°C for 20 minutes with steam, then another 20 minutes without.

Light Rye Sourdough
This light rye sourdough balances the robustness of rye with the elasticity of bread flour. The crumb is tight but tender, and the crust is deeply caramelized. The 20 cm Round Banneton Basket offers enough space for the loaf to expand evenly while maintaining the round form that suits scoring. Perfect for sandwiches or savory spreads.
Ingredients:
- 300 grams bread flour
- 200 grams rye flour
- 350 grams water
- 100 grams sourdough starter
- 10 grams salt
- 1 teaspoon caraway seeds (optional)
Step-by-Step Instructions:
- Combine all ingredients and mix until fully incorporated. Rest for 30 minutes.
- Fold the dough gently twice during a 3-hour bulk fermentation.
- Shape into a boule, cover with flour, and place in a floured round basket seam side up.
- Cold proof overnight for deeper flavor.
- Flip, score with a square or central slash, and bake at 225°C for 40 to 45 minutes.
We hope you enjoyed exploring these sourdough recipes designed specifically for our top-selling proofing baskets. Each loaf is an opportunity to connect with the craft of baking and experience the satisfaction of shaping, proofing, and baking your own bread from scratch. Do try these recipes in your kitchen and let us know how they turned out. We would love to hear your feedback in the comments below. Happy baking!
Styling and Scoring Ideas for Artisan Loaves
Styling and scoring give your sourdough loaves a professional finish while also enhancing the baking performance. The proofing basket for bread plays a foundational role by shaping the dough and creating a lightly textured surface that holds flour patterns beautifully. When combined with thoughtful scoring, the loaf rises predictably in the oven and displays distinctive patterns that reflect your personal style.
Using a sharp bread lame and a gentle touch, bakers can control the direction of the oven spring, open up the crust for airy expansion, and introduce striking designs. The following scoring styles are drawn from classic artisan techniques and are best suited to loaves proofed in a rattan basket dusted generously with flour. Each approach complements a specific bread shape and helps define the character of your finished loaf.
-

Wheat Ear Pattern
This classic pattern features a long central slash with smaller curved cuts that mimic a wheat stalk. It promotes strong oven spring and works best on oval loaves proofed in an oval banneton. The design opens beautifully during baking, creating a tall and defined crust. Ideal for rustic batards, this pattern gives a timeless artisan finish to your homemade sourdough.
-

Leaf Vein Design
The leaf vein pattern creates a symmetrical and decorative effect using a central score with curved side cuts. It is perfect for round loaves shaped in round proofing baskets. This scoring allows even expansion while maintaining structure. The result is a graceful crust design that adds elegance without over-opening the loaf. It’s a popular choice for home bakers aiming for beauty and balance.
-

Starburst Pattern
The starburst pattern radiates outward from the center of the loaf, resembling sun rays or petals. This striking scoring style suits round boules proofed in round banneton baskets. It allows for even steam release and impressive expansion. Ideal for high-hydration sourdough, the starburst creates a dynamic look that highlights the loaf’s surface and complements its open crumb structure.
-

Square Block Design
This clean and structured pattern uses a central square or diamond cut into the dough to control expansion and form height. It pairs well with round loaves made in medium-sized round baskets. The square block design adds modern appeal and helps create a balanced oven spring. Its simplicity and symmetry make it an excellent choice for consistent baking results and a bold crust.
-

Natural Crack Pattern
This rustic scoring style relies on minimal intervention, allowing the loaf to crack naturally as it bakes. Ideal for rye or whole grain doughs, this pattern is best used on round or oval loaves proofed in unlined baskets. It produces dramatic, uneven crevices that enhance crust texture and give the loaf an old-world, handcrafted appearance, perfect for traditional or heritage-style baking.
Frequently Asked Questions
Using a proofing basket for bread often brings up a few common questions, especially among home bakers who are just beginning their artisan sourdough journey. Whether you are wondering about preparation, cleaning, or how to prevent dough from sticking, understanding these basics will make the process smoother. These answers are designed to help you use your basket with confidence and care, ensuring consistent results and beautifully shaped loaves every time.
- What type of flour should I use to dust the basket?
Rice flour is the best choice for dusting your basket. It is less absorbent than wheat flour and forms a dry barrier between the dough and the basket surface. This prevents the dough from sticking and helps maintain the design left by the coils. You can also mix rice flour with all-purpose flour for additional coverage. - Can I use a regular bowl instead of a banneton?
A bowl lined with a kitchen towel can work in some cases, but it will not provide the same benefits as a proofing basket. You will miss out on airflow, surface shaping, and the spiral pattern that comes from rattan coils. A bowl may also lead to flatter loaves with less structure and less crust development. - Do I need to use a liner inside the basket?
A liner is optional and usually not needed if you flour your basket properly. In fact, many bakers prefer using the basket without a liner because it improves air circulation and creates a drier dough surface. This enhances crust quality and allows for more defined scoring. If your dough is extremely wet or you are just starting out, a liner can be helpful until you get more comfortable with flouring technique. - Is it safe to wash the basket with water?
It is best to avoid washing the basket with water. Rattan is a natural material that absorbs moisture easily and can develop mold if not dried properly. Instead, allow the basket to air dry completely after each use and brush off any remaining flour or dough. If needed, place the basket in the sun for a few hours to freshen it up. - How do I pick the right size basket?
Start by calculating the total weight of your dough, including flour, water, starter, salt, and any mix-ins. Then choose a basket that corresponds to that weight using a size guide. For example, dough weighing 700 grams fits best in a medium-sized round or oval basket. Choosing the right size ensures the dough has room to rise without overflowing or spreading too wide.
These answers will help you use your proofing basket more effectively and avoid common issues. With regular use, your basket will become a reliable part of your baking process, giving structure, shape, and a touch of artisan detail to every loaf.
Conclusion
Baking artisan bread at home is a journey that combines technique, tools, and creativity. A well-chosen proofing basket for bread is not just a shaping vessel, but a crucial partner in guiding fermentation, controlling structure, and achieving that unmistakable crust and crumb we associate with bakery-quality loaves. From choosing the right basket size to matching it with the perfect recipe, every detail adds up to help you master the art of bread making.
We hope this guide has inspired you to try new shapes, experiment with scoring techniques, and better understand how your tools affect the final result. Whether you're working with a simple sourdough boule or styling a rustic batard, the right proofing basket will elevate your baking practice with every loaf you shape.
For more practical insights on selecting the right basket for your baking needs, explore our Banneton Basket Buying Guide. If you need help getting started or maintaining your proofing basket over time, our blog on How to Prepare and Care for Your Banneton Basket offers detailed tips to keep your tools in top condition.
We’d love to hear about your baking experience and how these techniques worked for you. Try out the recipes, test different scoring styles, and let us know your results in the comments below. Happy baking from the team at Bakerykart.
Related Blog to Follow
Are you still looking for more interesting tips and idea on baking, lovely just follow our blog.
-

01-06-2018
Top 5 Reasons to Shop Baking Supplies Online
A reliable online store like Bakerykart can be answer to all your worries about baking supplies. Come to the website and....
View Detail -

31-05-2023
Discover the Essence of RAW HIMALAYAS Flour
Uncover the essence of RAW HIMALAYAS flour and experience its exceptional flavor and nutritional richness in your culina....
View Detail -

17-04-2025
Top Cheesecake Trends : Flavours that are taking over
Discover the top cheesecake flavour trends in 2025, from chocolate hazelnut to mango passionfruit, and get inspired to b....
View Detail