Sourdough Baking 101: A Beginner's Comprehensive Guide
01-01-2025
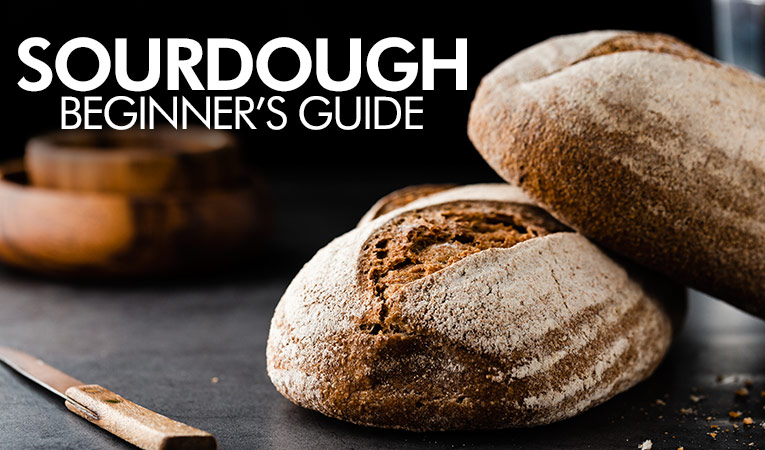
Sourdough Bread: A Beginner’s Guide to the Art of Fermented Breadmaking
Welcome to the wonderful world of sourdough bread! Are you ready to embark on a flavorful and rewarding baking journey? Look no further because in this comprehensive beginner's guide, we have everything you need to know about making sourdough bread from scratch.
In this sourdough beginner's guide, we will cover all the essential aspects of sourdough bread-making, starting from the very foundation: the sourdough starter. You'll learn how to create and maintain your own starter, and discover the magic that wild yeast and lactobacilli bring to the fermentation process.
But that's not all! We'll also delve into the step-by-step instructions for baking sourdough bread, from mixing the dough to achieving the perfect rise and achieving a crispy crust. Plus, we'll share a variety of mouthwatering sourdough bread recipes, including classic country-style loaves and tempting variations like whole wheat and flavored breads.
As if that wasn't enough, we'll also provide you with an ideal baking schedule to help you plan your sourdough bread-making journey, and introduce you to the essential tools that will elevate your baking experience. And to address any burning questions you may have, we'll have a section dedicated to answering frequently asked questions about sourdough bread and recipes.
So, stay tuned for a comprehensive and detailed guide on sourdough bread baking that will equip you with all the knowledge and skills to become a sourdough bread master. Get ready to fill your kitchen with the irresistible aroma of freshly baked sourdough bread, and prepare to impress your family and friends with your homemade creations.
Are you excited? We sure are! Let's dive into the wonderful world of sourdough bread together. Get your apron on, dust off your flour, and let's make some sourdough magic!
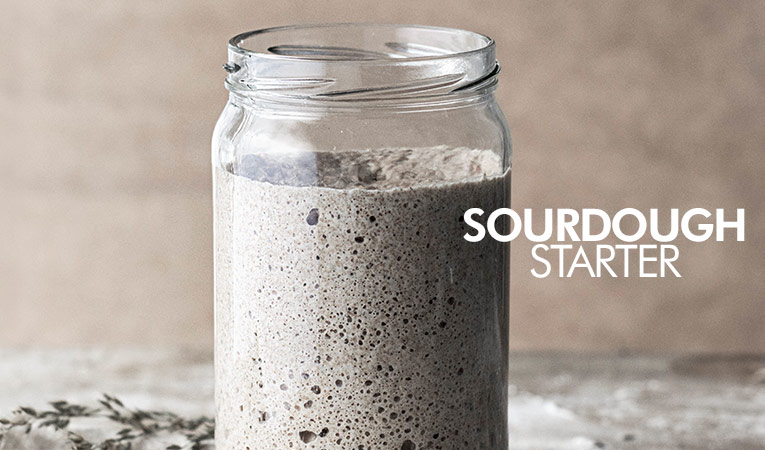
Sourdough Starter
A sourdough starter is a magical mixture of flour and water that undergoes fermentation to cultivate wild yeast and beneficial bacteria. This living culture becomes the heart and soul of sourdough bread, imparting its signature tangy flavor, chewy texture, and captivating aroma. With regular feedings and care, the starter develops strength and character, ready to leaven a variety of artisanal breads. It's a fascinating and rewarding process that unlocks the secrets of natural fermentation and the art of sourdough baking.
Fundamentals of Sourdough Bread
This section explores the core aspects of sourdough bread, focusing on the role of wild yeast and lactobacilli in fermentation, step-by-step instructions for creating a starter, the fermentation process, and troubleshooting common issues. It provides essential knowledge to help you understand and maintain a thriving sourdough starter.
- Role of Wild Yeast and Lactobacilli in Fermentation
- Wild yeast, found in the environment and on grain surfaces, interacts with flour and water in the starter.
- It consumes sugars and releases carbon dioxide, causing the dough to rise.
- Lactobacilli bacteria produce lactic acid, adding tangy flavor and extending the bread's shelf life.
- Step-by-Step Instructions for Creating a Sourdough Starter
- Combine equal parts of flour and water to make the starter.
- Allow the mixture to ferment over several days at room temperature.
- Feed the starter regularly with fresh flour and water to encourage microbial growth.
- Fermentation Process and Starter Maintenance
- Wild yeast and lactobacilli consume sugars in the flour, producing carbon dioxide and organic acids.
- Fermentation enhances the dough's flavor, texture, and structure.
- Regular feeding and maintenance (discarding part of the starter and refreshing it) ensure a balanced, active starter.
- Troubleshooting Common Issues
- Hooch: A layer of liquid on the starter indicates it needs feeding.
- Mold: Caused by contamination or poor maintenance; requires careful handling or restarting the starter.
- Sluggish Fermentation: Often due to temperature fluctuations or feeding imbalances; adjust conditions to revive the starter.
By grasping these fundamentals of sourdough starter creation and maintenance, you'll be ready to move on to the next stage: the step-by-step process of baking delicious sourdough bread.
Step by Step Instructions on Sourdough Baking
- Mixing the dough: Begin by combining your active sourdough starter with flour, water, and salt. Optionally, you can incorporate an autolyse period, allowing the flour and water to hydrate before adding the starter. This technique improves gluten development and enhances the flavor of the bread. Mix the ingredients until they form a shaggy dough, ensuring all the flour is hydrated.
- Bulk fermentation: During this stage, the dough undergoes fermentation, which develops flavor and strengthens the gluten structure. Incorporate a series of folds every 30 minutes to an hour during the bulk fermentation. Folds help build strength in the dough and redistribute the yeast and bacteria, promoting even fermentation. Cover the dough and let it ferment until it has visibly increased in volume and is puffy.
- Shaping the dough: Once the bulk fermentation is complete, it's time to shape the dough into the desired loaf style. Techniques for shaping include pre-shaping and final shaping. Pre-shaping involves gently rounding the dough to create tension, while final shaping gives the loaf its definitive shape. Different shaping techniques are used for boules (round loaves) and batards (oval loaves).
- Proofing: After shaping, the dough enters the proofing stage. Place the shaped dough in a proofing basket or a well-floured bowl, ensuring it is adequately covered to prevent drying out. The dough should undergo a final rise until it is visibly puffy and retains an indentation when gently pressed. The proofing time will vary depending on factors such as temperature and the strength of your starter.
- Scoring the loaf: Just before baking, it's essential to score the dough. Scoring involves making shallow cuts on the surface, allowing the bread to expand and preventing it from bursting irregularly. Use a sharp blade or a bread lame to create your desired pattern, such as a cross, a tic-tac-toe pattern, or intricate designs. The depth and angle of the cuts will affect the final appearance of the loaf.
- Baking: Achieving a crispy crust and an open crumb structure requires proper baking techniques. Preheat your oven and a baking vessel, such as a Dutch oven or baking stone, to create a hot environment. Place the dough in the preheated vessel and cover it, allowing steam to develop. Steam helps create a crusty exterior. Remove the cover halfway through baking to allow the loaf to brown and develop its characteristic crust. Monitor the internal temperature of the bread to ensure it is fully cooked.
By following these step-by-step instructions, you'll be able to create beautiful, artisan-style sourdough bread with a crispy crust and an airy, open crumb. Experiment with different shaping techniques, scoring patterns, and baking times to develop your signature loaf.
Sourdough Bread Recipes
Get ready to embark on a mouthwatering sourdough bread baking adventure with these delectable recipes. Each recipe is crafted to perfection, ensuring that you achieve the signature tangy flavor, chewy texture, and beautiful crust that sourdough bread is known for. Whether you're a seasoned baker or a beginner, these recipes will guide you through the process step by step, guaranteeing delicious results every time. From classic country-style loaves to unique variations like whole wheat and flavored breads, there's something for everyone to enjoy. So, put on your baking apron, gather your ingredients, and let's get started on creating these magical sourdough bread recipes that will surely impress your taste buds and leave you craving for more. Get ready to savor the aroma and taste of freshly baked homemade sourdough bread!

Classic Country-Style Sourdough Bread
Experience the rustic charm of Classic Country-Style Sourdough Bread: a crusty artisan loaf with a tangy and tender crumb that will transport you to a traditional farmhouse kitchen.
Ingredients:
- 500g bread flour
- 350g water
- 100g active sourdough starter
- 10g salt
Instructions:
- In a mixing bowl, combine the flour and water, allowing it to hydrate for 30 minutes (autolyse method).
- Add the sourdough starter and salt to the dough, and mix until well incorporated.
- Perform a series of folds during bulk fermentation, allowing the dough to rise for 3-4 hours or until it has increased in volume.
- Shape the dough into a round boule and let it proof in a floured banneton or bowl for 2-3 hours.
- Preheat the oven and a Dutch oven at 450°F (230°C).
- Carefully transfer the dough into the preheated Dutch oven, cover with the lid, and bake for 20 minutes.
- Remove the lid and continue baking for another 20-25 minutes until the crust is golden brown and the bread sounds hollow when tapped.
- Allow the bread to cool completely before slicing.

Whole Wheat Sourdough Bread
Indulge in the wholesome goodness of Whole Wheat Sourdough Bread: a nourishing and flavorful loaf made with whole wheat flour, offering a hearty texture and a hint of nuttiness.
Ingredients:
- 400g bread flour
- 100g whole wheat flour
- 350g water
- 100g active sourdough starter
- 10g salt
Instructions:
- Follow the same steps as the classic country-style sourdough bread recipe, but replace 100g of bread flour with whole wheat flour.
- Adjust the hydration if needed, as whole wheat flour absorbs more water than white flour.
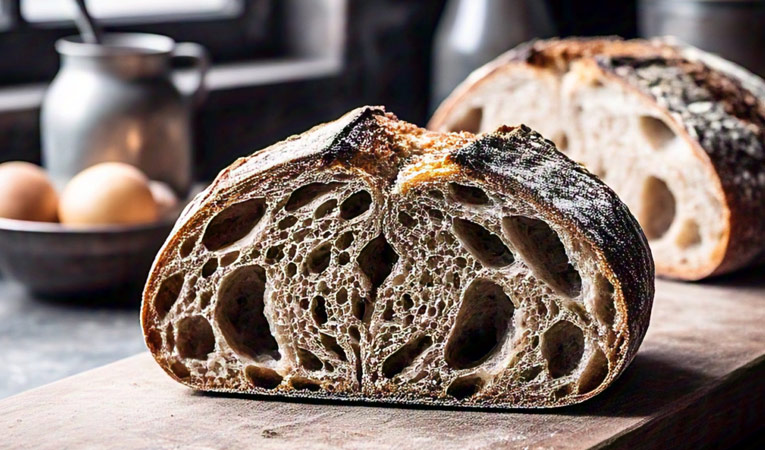
Rye Sourdough Bread
Experience the rich and robust flavors of Rye Sourdough Bread: a delectable loaf made with rye flour, known for its distinctive taste and dense texture. Enjoy the complex flavors and earthy notes that rye brings to this traditional sourdough bread.
Ingredients:
- 400g bread flour
- 100g rye flour
- 350g water
- 100g active sourdough starter
- 10g salt
Instructions:
- Follow the same steps as the classic country-style sourdough bread recipe, but replace 100g of bread flour with rye flour.
- Rye flour tends to be stickier, so adjust the hydration as needed.
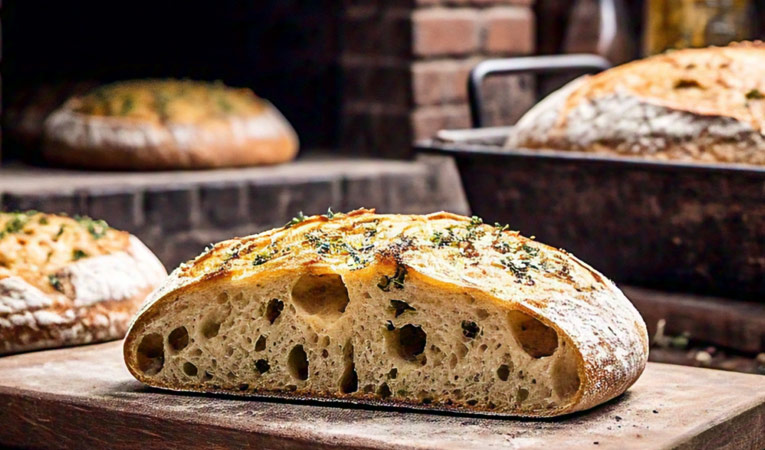
Flavored Sourdough Bread (Garlic and Herb)
Elevate your sourdough bread with a burst of flavor with our Garlic and Herb Flavored Sourdough Bread recipe. Infused with aromatic garlic and fragrant herbs, this bread is a delicious twist on the classic. Indulge in the savory combination that will leave your taste buds craving for more.
Ingredients:
- 500g bread flour
- 350g water
- 100g active sourdough starter
- 10g salt
- 4-5 cloves of garlic, minced
- Fresh herbs (such as rosemary, thyme, or basil), chopped
Instructions:
- Follow the same steps as the classic country-style sourdough bread recipe, but add the minced garlic and chopped herbs during the mixing process.
- Incorporate the garlic and herbs evenly into the dough before bulk fermentation.
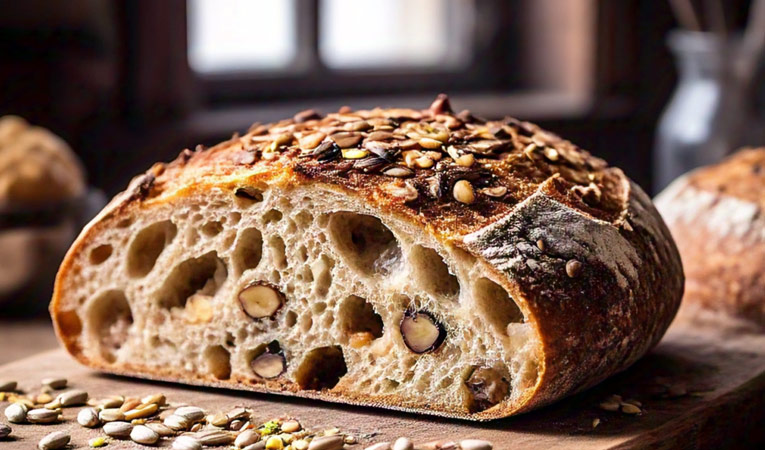
Nut and Seed Sourdough Bread
Indulge in the wholesome goodness of our Nut and Seed Sourdough Bread. Packed with a delightful mix of nuts and seeds, including almonds, walnuts, sunflower seeds, and flaxseeds, this bread offers a crunchy texture and a nutty flavor that will take your sourdough experience to the next level. Enjoy the nutritious combination of flavors and add a healthy twist to your baking repertoire.
Ingredients:
- 500g bread flour
- 350g water
- 100g active sourdough starter
- 10g salt
- Assorted nuts and seeds (such as walnuts, sunflower seeds, and flaxseeds), roughly chopped
Instructions:
- Follow the same steps as the classic country-style sourdough bread recipe, but add the chopped nuts and seeds during the mixing process.
- Ensure that the nuts and seeds are distributed evenly throughout the dough.
Feel free to experiment with these recipes and adjust the ingredients and ratios to suit your preferences. Sourdough bread offers endless possibilities for creativity and flavor combinations.
Ideal Baking Schedule for Sourdough
- Day 1 - Morning:
- Feed your sourdough starter to ensure it's active and vigorous.
- Allow the starter to reach its peak fermentation before using it in the dough. This usually takes 4-6 hours, depending on the temperature and the strength of your starter.
- Day 1 - Afternoon/Evening:
- Mix the dough by combining the flour, water, and sourdough starter in a large bowl.
- Perform the autolyse method by letting the dough rest for 30 minutes to hydrate the flour and develop gluten.
- Add salt and perform a series of folds every 30 minutes during the bulk fermentation period. Aim for 3-4 hours of bulk fermentation, or until the dough has increased in volume and developed strength.
- Day 1 - Night:
- Shape the dough into a round boule or batard and place it in a floured banneton or bowl.
- Let the dough undergo its final rise, also known as the proofing stage. This can take anywhere from 2-4 hours, depending on the ambient temperature and the desired level of sourness.
- Day 2 - Morning:
- Preheat your oven and a Dutch oven or baking stone at the highest temperature possible (usually around 450°F or 230°C).
- Once the oven is hot, carefully transfer the proofed dough onto a piece of parchment paper.
- Score the dough with a sharp knife or bread lame to control expansion during baking and create an attractive pattern.
- Place the dough into the preheated Dutch oven or onto the baking stone.
- Bake with the lid on for the first 20 minutes to trap steam and create a crispy crust.
- Remove the lid and continue baking for an additional 20-30 minutes, or until the crust is golden brown and the bread sounds hollow when tapped.
- Day 2 - Cooling:
- Once baked, transfer the bread to a wire rack and let it cool completely before slicing. This allows the crumb to set and develop its final texture.
Adapting the Schedule
- If you have limited time during the day, you can opt for a longer bulk fermentation period by placing the dough in the refrigerator overnight after the initial mixing. This slow fermentation can enhance flavor development.
- Adjust the proofing time based on your schedule and desired sourness. Longer proofing times can result in a more pronounced sour flavor, while shorter proofing times yield a milder flavor.
- Experiment with different fermentation temperatures to control the speed and flavor of the sourdough. Warmer temperatures speed up fermentation, while cooler temperatures slow it down.
Remember, sourdough baking requires patience and practice. Don't be discouraged if your first few loaves don't turn out perfect. Each bake is an opportunity to learn and improve your skills.
Essential Sourdough Tools
- Banneton baskets: Bannetons, also known as proofing baskets, are woven baskets used for shaping and proofing sourdough bread. They provide support to the dough, help maintain its shape, and create beautiful patterns on the crust.
- Dutch ovens or baking stones: These tools are essential for achieving a crispy crust and optimal oven spring in sourdough bread. Dutch ovens trap steam during baking, creating a moist environment that promotes a crusty exterior. Baking stones help distribute heat evenly, resulting in a more consistent bake.
- Bread lames: A bread lame is a razor blade attached to a handle, used for scoring the dough. Scoring serves multiple purposes: it controls the expansion of the dough, allows steam to escape during baking, and creates an artisanal appearance on the crust.
For more information on essential ingredients and tools for sourdough bread baking, you can refer to our previous blog post, "Essential Ingredients & Tools for Sourdough Breads." This article covers the necessary components for successful sourdough breadmaking.
FAQ on Sourdough Bread & Recipe
- Can I use different types of flour for sourdough bread?
Yes, you can experiment with various flours like whole wheat, rye, spelt, or einkorn to achieve different flavors and textures in your sourdough bread. Just keep in mind that different flours may require adjustments in hydration and fermentation times. - How can I achieve an open crumb structure in my bread?
To achieve an open crumb, focus on proper gluten development through techniques like stretch and folds during bulk fermentation. Using a high-protein flour, maintaining proper hydration, and avoiding excessive handling of the dough can also contribute to an open crumb. - Can I add additional ingredients like nuts, seeds, or dried fruits to my sourdough bread?
Yes, you can incorporate additional ingredients to add flavor and texture to your bread. Add them during the mixing or folding stage, ensuring they are evenly distributed. Keep in mind that extra ingredients may affect hydration and fermentation, so adjustments may be necessary. - How should I store my sourdough bread?
To maintain freshness, store your sourdough bread in a paper bag or bread box at room temperature. Avoid storing it in the refrigerator, as it can accelerate staling. If necessary, you can freeze sliced or whole loaves for longer-term storage. - How long does it take to see bubbles and activity in my sourdough starter?
The time it takes to see bubbles and activity in your sourdough starter can vary. Typically, it can take anywhere from a few days to a week or more, depending on factors like temperature, flour type, and initial conditions. Patience is key, as it may take time for the microbial ecosystem to establish. - Can I use my sourdough starter straight from the refrigerator?
It's generally recommended to feed and activate your sourdough starter before using it in a recipe. Bringing it to room temperature and feeding it allows the yeast and bacteria to become active and provides a more robust fermentation process. - How can I troubleshoot a sourdough starter that is not rising or bubbling?
If your sourdough starter is not rising or showing signs of activity, try adjusting the feeding ratio or temperature. Increasing the frequency of feedings or adjusting the hydration level might also help. If the issue persists, you may need to revive or create a new starter using fresh flour and water. - Can I use sourdough discard in recipes?
Yes, sourdough discard can be used in recipes like pancakes, waffles, and quick breads. It adds a tangy flavor and can be a great way to minimize waste. - Why does my sourdough bread sometimes turn out dense?
Dense sourdough bread can be the result of underproofing, overhandling the dough, or inadequate gluten development. Ensure that the dough has properly risen during bulk fermentation and proofing. Additionally, be gentle when shaping the dough to avoid deflating it. - How can I achieve a more pronounced sour flavor in my bread?
To enhance the sourness, you can adjust the fermentation time and temperature. Longer fermentation at cooler temperatures promotes the growth of lactic acid bacteria, resulting in a more pronounced sour flavor. However, keep in mind that excessive fermentation can affect texture and structure, so it's essential to find a balance.
Congratulations on completing our sourdough beginner's guide! We hope this comprehensive resource has provided you with all the information and guidance you need to start your sourdough baking journey. By mastering the art of creating a sourdough starter, understanding the baking process, exploring different recipes, following an ideal schedule, and using the essential tools, you're well on your way to baking delicious and flavorful sourdough bread.
We value your feedback and would love to hear about your experience with sourdough bread. Please leave your comments and share your creations in the comment section below. You can also tag us on Instagram or Facebook @bakerykart to showcase your sourdough masterpieces. We're excited to be a part of your baking adventure and look forward to seeing your delicious creations!
Remember, sourdough baking is an art that takes practice and experimentation. Don't be discouraged by any initial challenges. Keep honing your skills, trying new recipes, and exploring the endless possibilities of sourdough bread. Enjoy the process and the satisfaction of biting into a crusty, tangy, and wholesome loaf that you've baked with your own hands.
Happy baking and bon appétit!


