

The Art of French Pastry: Mastering Classic Techniques and Recipes
21-06-2023

French pastry is renowned for its delicate textures, exquisite flavors, and elegant presentations. From flaky croissants to creamy crème brûlée, each creation is a work of art. In this blog, we will dive into the world of French pastry, exploring the classic techniques and recipes that have enchanted taste buds for centuries. Get ready to unleash your inner pastry chef as we guide you through the secrets of creating these culinary masterpieces. Whether you're a seasoned baker or a beginner, this journey into French patisserie will inspire and elevate your baking skills to new heights. So, grab your apron, preheat your oven, and let's embark on a delectable adventure through the art of French pastry!
Essential Techniques for French Pastry
French pastry requires precision and attention to detail. Mastering these essential techniques will set the foundation for creating exquisite pastries. Let's explore the key techniques that every aspiring pastry chef should know:
The Importance of Precise Measurements and Weighing Ingredients
In French pastry, accurate measurements are crucial for achieving consistent and reliable results. Invest in a kitchen scale to weigh your ingredients instead of relying solely on volume measurements. This ensures the right balance of flavors and textures in your pastries.
- Mastering the Art of Making a Perfect Pâte Brisée (Shortcrust Pastry) : Pâte brisée is the go-to pastry dough for tarts, quiches, and savory pies. It requires careful mixing of cold butter, flour, and a touch of salt to achieve a crumbly texture. Discover the secrets to creating a tender and flaky pâte brisée that melts in your mouth.
- Working with Pâte Feuilletée (Puff Pastry) for Heavenly Layers : Pâte feuilletée is renowned for its buttery, flaky layers that add a touch of luxury to pastries. Learn the art of creating the laminated dough through a process of folding and rolling butter between thin layers of dough. Mastering this technique will open doors to a wide array of delicate pastries.
- The Art of Tempering Chocolate for Elegant Decorations: Chocolate decorations add a touch of sophistication to French pastries. Tempering chocolate is the process of melting, cooling, and reheating it to create a glossy finish and a firm texture. Discover the correct temperatures and techniques for tempering chocolate to achieve professional-looking decorations.
- Achieving Smooth and Silky Custards and Creams through Proper Tempering and Cooking Techniques : French pastry is renowned for its luscious custards and creams. Master the art of tempering eggs to create smooth textures and avoid curdling. Learn the proper cooking techniques and temperatures for creating silky pastry creams, crème anglaise, and crème pâtissière that will elevate your pastries to new heights.
By honing these essential techniques, you'll develop a solid foundation for creating authentic and delicious French pastries. With practice and patience, you'll gain the confidence to explore a variety of recipes and unleash your creativity in the world of French pastry. Stay tuned for the next section where we delve into classic French pastry recipes that will transport you to the heart of Parisian patisseries.
Classic French Pastry Recipes
Indulge in the timeless allure of classic French pastry recipes. From flaky croissants to delicate macarons, these iconic treats will transport you to the charming streets of Paris. Let's explore some beloved recipes and uncover the secrets behind their creation:
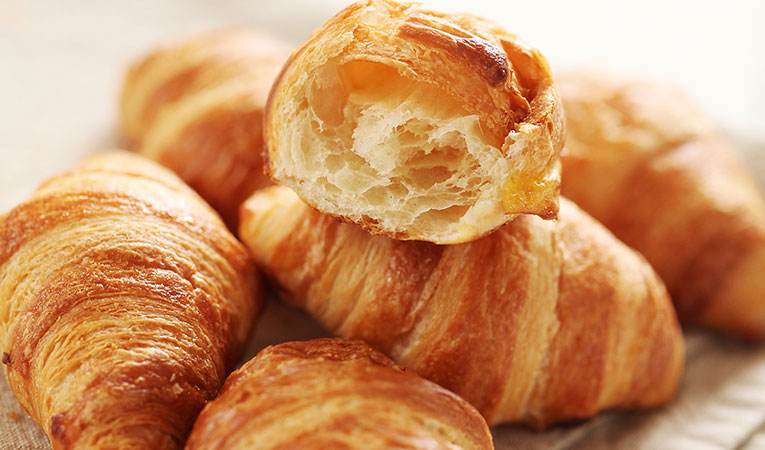
Crispy and Buttery Croissants: A Step-by-Step Guide to Laminated Dough
Indulge in the irresistible allure of homemade croissants with our step-by-step guide to mastering laminated dough. With their flaky layers and rich buttery flavor, croissants are the epitome of French pastry perfection. Join us on a journey through the art of laminated dough as we unravel the secrets behind creating the perfect croissant.
Ingredient :
- 500 grams all-purpose flour
- 10 grams salt
- 50 grams granulated sugar
- 10 grams active dry yeast
- 250 milliliters warm water
- 250 grams unsalted butter, cold
Instruction :
- Activate the yeast: In a small bowl, dissolve the yeast and a pinch of sugar in warm water. Let it sit for about 5 minutes until it becomes frothy.
- Prepare the dough: In a large mixing bowl, combine the flour, salt, and sugar. Make a well in the center and pour in the activated yeast mixture. Mix the ingredients together until a rough dough forms.
- Knead the dough: Transfer the dough onto a lightly floured surface and knead it for about 10 minutes until it becomes smooth and elastic. Shape the dough into a ball.
- Rest the dough: Place the dough back into the mixing bowl and cover it with a clean kitchen towel. Allow it to rest in a warm, draft-free area for about 1 hour or until it doubles in size.
- Prepare the butter block: While the dough is resting, prepare the butter block. Place the cold butter between two sheets of parchment paper and pound it with a rolling pin until it flattens and becomes pliable. Shape the butter into a square, about 1/2 inch thick. Place the butter block in the refrigerator to chill.
- Laminate the dough: On a lightly floured surface, roll out the rested dough into a large rectangle, about 1/4 inch thick. Take the chilled butter block from the refrigerator and place it in the center of the dough. Fold the dough over the butter block, sealing it completely.
- Roll and fold: Roll out the dough with a rolling pin, lengthening it into a long rectangle. Fold the dough into thirds, like folding a letter. Rotate the dough 90 degrees and repeat the rolling and folding process two more times. This creates the layers in the croissants.
- Shape the croissants: Roll out the dough into a large rectangle, about 1/4 inch thick. Using a sharp knife or a pizza cutter, cut triangles from the dough. Stretch each triangle slightly and roll it up from the base towards the tip, creating the classic croissant shape. Place the shaped croissants onto a baking sheet lined with parchment paper.
- Proof the croissants: Cover the shaped croissants with a clean kitchen towel and let them proof in a warm, draft-free area for about 1-2 hours, until they double in size.
- Bake the croissants: Preheat the oven to 200°C (400°F). Brush the croissants with an egg wash for a shiny golden finish. Bake them for about 15-20 minutes, or until they turn golden brown and crispy.
- Enjoy: Remove the croissants from the oven and let them cool slightly on a wire rack. Serve warm and enjoy the deliciously crispy and buttery croissants.
Mastering the art of making croissants takes practice and patience, but with this step-by-step guide, you'll be able to create your own homemade croissants that rival those from a French bakery. So, roll up your sleeves, embrace the lamination process, and get ready to savor the delectable flavors of these classic pastries.
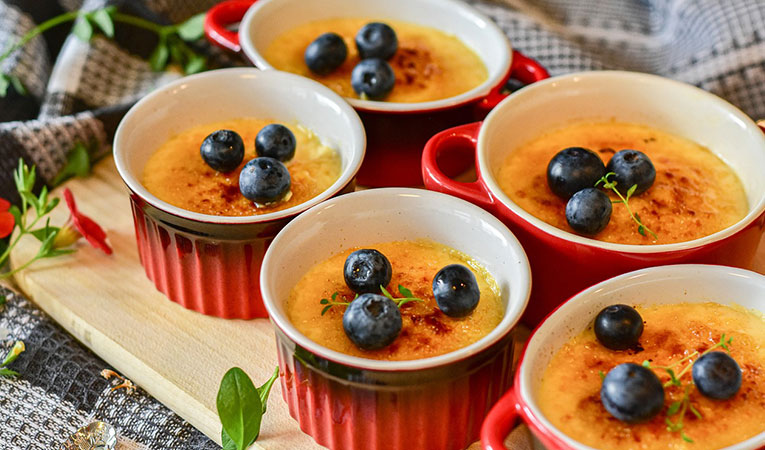
Decadent Crème Brûlée: Perfecting the Creamy Custard and Caramelized Topping
Prepare to embark on a culinary adventure as we guide you through the process of creating homemade croissants. With their delicate layers, crispy exterior, and rich buttery taste, croissants are a true delight for pastry lovers. In this step-by-step guide, we'll demystify the art of laminated dough and empower you to make your own delectable croissants from scratch.
Recipe Ingredients:
For the Dough:
- 500 grams all-purpose flour
- 10 grams salt
- 50 grams granulated sugar
- 10 grams instant yeast
- 250 milliliters whole milk, chilled
- 250 grams unsalted butter, cold
For the Egg Wash:
- 1 egg
- 1 tablespoon milk
Instructions :
- Prepare the Dough:
- In a mixing bowl, combine the flour, salt, sugar, and instant yeast. Mix well.
- Gradually add the chilled milk while stirring until a shaggy dough forms.
- Transfer the dough to a lightly floured surface and knead for about 5 minutes until smooth and elastic.
- Shape the dough into a rectangle and wrap it in plastic wrap. Refrigerate for 30 minutes.
- Prepare the Butter Block:
- Place the cold unsalted butter between two sheets of parchment paper.
- Use a rolling pin to pound and flatten the butter until it forms a rectangle measuring approximately 10x15 cm.
- Refrigerate the butter block until firm.
- Laminate the Dough:
- Roll out the chilled dough on a lightly floured surface into a rectangle larger than the butter block.
- Place the butter block in the center of the dough and fold the edges over, sealing the butter inside.
- Roll out the dough into a larger rectangle, ensuring the butter remains enclosed.
- Fold the dough into thirds, like a letter. This is the first "turn."
- Repeat the rolling and folding process two more times, chilling the dough between turns.
- Shape and Proof the Croissants:
- Roll out the laminated dough into a large rectangle, about 5mm thick.
- Cut triangles from the dough, with each base measuring approximately 10-12 cm.
- Stretch the triangle gently and roll it up tightly, starting from the base to the tip.
- Place the shaped croissants on a baking sheet lined with parchment paper, leaving space between each one.
- Cover the croissants loosely with plastic wrap and let them proof at room temperature for 2-3 hours, or until they have doubled in size.
- Bake and Enjoy:
- Preheat the oven to 200°C (400°F).
- In a small bowl, whisk together the egg and milk to make the egg wash.
- Brush the croissants with the egg wash, ensuring they are evenly coated.
- Bake the croissants for about 15-20 minutes or until golden brown and crispy.
- Remove the croissants from the oven and let them cool on a wire rack.
- Serve the croissants warm or at room temperature, and savor the irresistible combination of crispy exterior and buttery layers.
You have successfully mastered the art of creating crispy and buttery croissants with our step-by-step guide to laminated dough. These homemade delights are perfect for breakfast, brunch, or any special occasion.
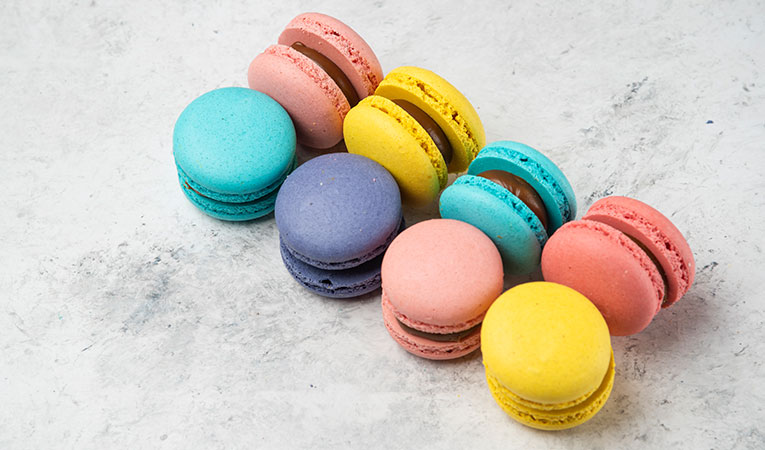
Delicate Macarons: From Macaronage to Ganache Fillings, a Foolproof Recipe
Indulge in the delicate world of macarons with our foolproof recipe that will guide you through each step, from mastering the macaronage technique to creating delectable ganache fillings. These dainty French treats are known for their smooth, dome-shaped shells and a burst of flavor in every bite. Join us as we unlock the secrets to creating picture-perfect macarons that are sure to impress.
Ingredients:
For the Macaron Shells:
- 120 grams almond flour
- 200 grams powdered sugar
- 100 grams egg whites (aged for 24 hours)
- 30 grams granulated sugar
- Gel food coloring (optional)
For the Ganache Fillings:
- 150 grams chocolate (dark, milk, or white, depending on preference)
- 150 milliliters heavy cream
- Flavorings or extracts (optional, e.g., vanilla, coffee, raspberry)
Instructions :
- Prepare the Macaron Shells:
- In a bowl, sift together the almond flour and powdered sugar. Set aside.
- In a separate mixing bowl, beat the egg whites until foamy. Gradually add the granulated sugar while continuing to beat until stiff peaks form.
- Carefully fold the dry ingredients into the meringue using the macaronage technique. The batter should be smooth and flow like lava.
- If desired, add a few drops of gel food coloring and gently fold until evenly incorporated.
- Transfer the batter to a piping bag fitted with a round tip.
- Pipe and Rest the Macarons:
- Line a baking sheet with parchment paper or a silicone mat.
- Pipe small, evenly-sized circles onto the prepared baking sheet, leaving space between each macaron.
- Tap the baking sheet on the counter a few times to release any air bubbles. Let the macarons rest at room temperature for about 30 minutes to develop a dry skin.
- Bake and Cool the Macarons:
- Preheat the oven to 150°C (300°F).
- Bake the macarons for 15-18 minutes, rotating the baking sheet halfway through for even cooking. The macarons should have smooth, firm shells and develop their signature feet.
- Remove the macarons from the oven and let them cool completely on the baking sheet before gently peeling them off.
- Prepare the Ganache Fillings:
- Chop the chocolate into small pieces and place them in a heatproof bowl.
- In a saucepan, heat the heavy cream over medium heat until it begins to simmer. Pour the hot cream over the chocolate and let it sit for a minute.
- Stir the mixture until the chocolate is completely melted and the ganache is smooth and shiny.
- If desired, add flavorings or extracts to enhance the ganache's taste. Allow the ganache to cool and thicken slightly.
- Fill and Assemble the Macarons:
- Pair up macaron shells of similar size and shape.
- Spoon or pipe a small amount of ganache onto the flat side of one shell, then gently press another shell on top to create a sandwich.
- Repeat with the remaining macaron shells and ganache fillings.
- For best results, refrigerate the filled macarons for 24 hours to allow the flavors to meld and the texture to mature.
Congratulations on successfully creating delicate macarons using our foolproof recipe. The combination of smooth macaron shells and luscious ganache fillings is a true delight for the senses. Share your experience, experiment with different flavors, and impress your friends and family with your newfound macaron mastery.
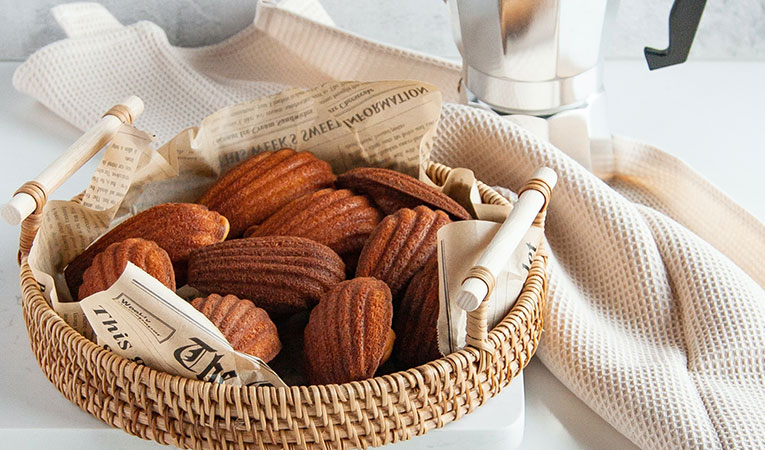
Fluffy Madeleines: Unveiling the Secrets of Their Distinctive Shape and Texture
Transport yourself to the enchanting world of French patisserie with fluffy madeleines. These delicate shell-shaped cakes are known for their distinctively light and airy texture. Join us as we unveil the secrets behind achieving the perfect madeleine, from the batter preparation to the baking technique. Get ready to indulge in these buttery, sponge-like treats that will transport you to the streets of France.
Recipe Ingredients:
- 2/3 cup all-purpose flour
- 1/2 teaspoon baking powder
- Pinch of salt
- 1/2 cup unsalted butter, melted and cooled
- 2/3 cup granulated sugar
- 3 large eggs, at room temperature
- 1 teaspoon vanilla extract
- Zest of 1 lemon (optional, for flavor variation)
- Powdered sugar, for dusting
Instructions :
- Preparing the Madeleine Batter:
- In a bowl, whisk together the flour, baking powder, and salt. Set aside.
- In a separate mixing bowl, beat the melted butter and granulated sugar until well combined.
- Add the eggs one at a time, beating well after each addition. Stir in the vanilla extract and lemon zest (if using).
- Gradually add the dry ingredients to the wet ingredients, mixing until just combined. Be careful not to overmix, as it can result in denser madeleines.
- Cover the batter and refrigerate for at least 1 hour, or overnight if possible. Chilling the batter allows the flavors to develop and creates a better texture.
- Preparing the Madeleine Molds:
- Preheat the oven to 190°C (375°F) and generously butter and flour the madeleine molds. This ensures easy removal of the baked madeleines.
- Tap out any excess flour from the molds.
- Baking the Madeleines:
- Fill each mold with about 1 tablespoon of the chilled batter. The molds should be about three-quarters full.
- Place the filled molds on a baking sheet and bake in the preheated oven for 10-12 minutes, or until the madeleines are golden brown around the edges and spring back when lightly touched.
- Remove the madeleines from the oven and let them cool in the molds for a couple of minutes.
- Carefully transfer the madeleines to a wire rack to cool completely.
- Serving the Madeleines:
- Dust the cooled madeleines with powdered sugar just before serving.
- Serve the madeleines with a cup of tea or coffee for a delightful afternoon treat.
The combination of their distinctive shape and delicate texture makes them a delightful addition to any dessert table or afternoon tea. Share your experience with these classic French treats, experiment with different flavors and variations, and enjoy the simple pleasures of indulging in a homemade madeleine. Bon appétit!
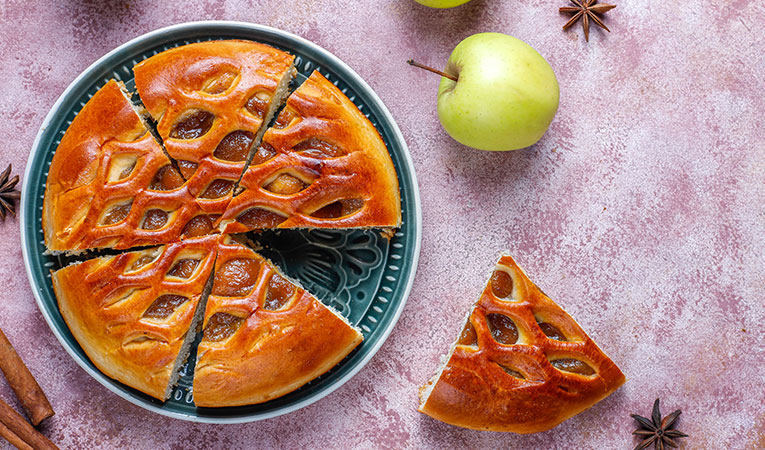
Heavenly Tarte Tatin: Caramelized Apples Atop Buttery Pastry, a French Favorite
Experience a slice of French culinary heaven with the irresistible tarte Tatin. This classic French dessert features caramelized apples nestled atop a flaky, buttery pastry. Join us as we delve into the secrets of creating the perfect tarte Tatin, from selecting the right apples to mastering the art of caramelization. Get ready to indulge in this heavenly dessert that will captivate your senses and leave you craving for more.
Recipe Ingredients:
- 6-8 medium-sized apples (preferably tart and firm varieties like Granny Smith or Braeburn)
- 1 cup granulated sugar
- 1/2 cup unsalted butter, cut into cubes
- 1 sheet of store-bought puff pastry, thawed
- Optional: Vanilla ice cream or whipped cream, for serving
Instructions
- Preparing the Apples:
- Peel, core, and quarter the apples. You can leave the apples whole if they are smaller in size.
- Set aside the prepared apples.
- Caramelizing the Apples:
- In a 9 or 10-inch ovenproof skillet or Tatin dish, heat the sugar over medium heat until it melts and turns into a golden caramel color. Swirl the pan occasionally to ensure even caramelization.
- Add the butter cubes to the caramel and stir gently until melted and combined.
- Carefully arrange the apple quarters (or whole apples) in a single layer, rounded side down, in the caramel. The apples should fit tightly together.
- Baking the Tarte Tatin:
- Preheat the oven to 200°C (400°F).
- Roll out the puff pastry to slightly larger than the skillet's diameter. Place the pastry over the apples and tuck the edges down around the apples.
- Using a sharp knife, make a few small slits in the pastry to allow steam to escape during baking.
- Bake the tarte Tatin in the preheated oven for 25-30 minutes or until the pastry is golden brown and crispy.
- Serving the Tarte Tatin:
- Remove the skillet from the oven and let it cool for a few minutes.
- Place a serving plate or platter over the skillet and carefully invert the tarte Tatin onto the plate, using oven mitts or a towel to protect your hands.
- Serve the tarte Tatin warm, either as is or with a scoop of vanilla ice cream or dollop of whipped cream.
Indulge in the heavenly delight of tarte Tatin and savor the combination of caramelized apples and buttery pastry. Whether enjoyed as a comforting dessert or an impressive centerpiece for a special occasion, this French favorite will captivate your taste buds and leave you craving for more. Take pleasure in creating this culinary masterpiece and share the joy of this classic treat with family and friends. Bon appétit!
With these classic French pastry recipes in your repertoire, you'll have the tools to create unforgettable culinary experiences. From breakfast treats to show-stopping desserts, these recipes will delight your family and friends, and transport you to the enchanting world of French patisseries. Bon appétit! Share your thoughts and experiences in the comments below and let us know which French pastry is your favorite!
Elevating French Pastry with Modern Twists
French pastry is steeped in tradition, but that doesn't mean you can't put a modern spin on it. Elevate your French pastry game by infusing traditional recipes with unique flavor combinations and ingredients that add a surprising twist. Experiment with unexpected flavors like lavender-infused cream in éclairs or matcha-flavored macarons. By blending classic techniques with innovative flavors, you'll create pastry masterpieces that tantalize the taste buds and awaken the senses.
- Infusing traditional recipes with unique flavor combinations and ingredients opens up a world of exciting possibilities. Experiment with unexpected pairings like cardamom and orange in your croissants or rosemary and lemon in your tarts. Let your creativity run wild as you blend classic flavors with innovative ingredients, creating a delightful surprise for your taste buds.
- Adapting classic techniques to cater to dietary preferences is essential in today's culinary landscape. Explore vegan and gluten-free variations by substituting traditional ingredients with plant-based alternatives or alternative flours. With a little experimentation and creativity, you can ensure that everyone can enjoy the indulgence of French pastries, regardless of dietary restrictions.
- Creative plating and presentation ideas add a contemporary touch to your French pastry creations. Think outside the box and experiment with geometric designs, edible flowers, or artistic drizzles to make your desserts visually stunning. Elevate the dining experience by paying attention to the aesthetics of your pastries, creating a feast for both the eyes and the palate.
- Incorporating seasonal fruits and ingredients adds vibrancy and freshness to your French pastries. Embrace the flavors of each season by showcasing seasonal fruits in your tarts, cakes, and desserts. From juicy strawberries in the summer to spiced apples in the fall, seasonal ingredients bring a dynamic element to your creations and highlight the best that nature has to offer.
By infusing unique flavors, catering to dietary preferences, exploring creative plating, and incorporating seasonal ingredients, you can elevate the art of French pastry to new heights. Embrace the spirit of innovation while honoring the traditions of French pastry, and watch as your creations become a delightful blend of classic and contemporary. Let your imagination soar as you explore the endless possibilities of modern twists on French pastry.
Conclusion
The art of French pastry is a delightful journey that combines precise techniques, quality ingredients, and a passion for culinary excellence. By mastering the essential techniques and exploring classic recipes, you can bring the flavors of Parisian patisseries into your own kitchen. Don your chef's hat and unleash your creativity as you embark on this delectable adventure. Whether you choose to make flaky croissants, silky crème brûlée, or delicate macarons, each creation will be a testament to your dedication and love for the art of French pastry. So, go ahead and indulge in the magic of French patisserie – your taste buds will thank you! Share your favorite French pastry creations and any questions or tips in the comments below. Bon appétit!
Related Blog to Follow
Are you still looking for more interesting tips and idea on baking, lovely just follow our blog.
-

01-06-2023
Guilt-Free Sweetness: Callebaut's MALCHOC No Added Sugar Chocolate
Savor guilt-free sweetness with Callebaut's MALCHOC No Added Sugar Chocolate, a delicious blend of taste and health-cons....
View Detail -

27-06-2026
Valrhona Recipe: Premium Chocolate Recipes Every Baker Should Try
Discover six premium Valrhona chocolate recipes featuring mousse, tartlets, ice cream, chocolate bars, biscuits, and ele....
View Detail -

28-05-2023
Unlock the Flavors: Callebaut 500grms Pack for Home Bakers
Indulge in Callebaut's 500grms Pack, a perfect choice for home bakers, delivering premium chocolate excellence....
View Detail