What are the 3 Methods for Tempering Chocolate?
29-05-2025
Tempering chocolate is an essential skill for anyone working with chocolate, whether you are a home baker or a professional chocolatier. It involves melting and finishing chocolate at precise temperatures to align the cocoa butter crystals in a stable form. This process gives chocolate its beautiful glossy appearance, smooth texture, and a clean snap when broken or bitten into. If chocolate is not tempered correctly, it can turn dull, develop white streaks, or take on a soft, chalky texture. These flaws not only affect how the chocolate looks but also how it feels and tastes.
As more home bakers explore artisan confections and chocolate-based desserts, this technique has become increasingly popular beyond professional kitchens. With the right tools and a little practice, tempering can be learned and applied in any well-equipped home kitchen. From coating fruits and nuts to preparing chocolate decorations and bars, learning how to temper provides better control over both the appearance and durability of your chocolate work.
This blog will introduce you to three commonly used methods, each offering a practical way to temper chocolate with consistent results. These include the double boiler method, ideal for controlled melting, the microwave method for convenience, and the marble or table top method for precision. Each one suits a different skill level and setup, whether you are working with small batches or crafting chocolates in larger volumes.
Tempering chocolate may seem like a technical step, but once understood, it becomes second nature. With a little guidance, you will be able to choose the right approach and achieve chocolate that sets beautifully, performs reliably, and brings a professional touch to your creations.
What is Tempering Chocolate?
Tempering chocolate is the controlled process of melting and finishing chocolate to stabilize the cocoa butter within it. This technique ensures that once the chocolate sets, it has a glossy finish, a smooth texture, and a crisp snap. When chocolate is not tempered properly, it can appear dull, develop white streaks known as fat bloom, or take on a soft, uneven texture. These visual and textural flaws not only affect the appearance but also reduce the overall quality of the final product.
The key to successful tempering lies in managing the cocoa butter's crystal structure. Cocoa butter can form multiple types of crystals, but only one, known as the beta crystal, provides the ideal texture and stability. By carefully melting and finishing the chocolate within precise temperature ranges, you encourage the formation of this stable crystal structure.
Each type of chocolate has its own melting and finishing temperatures:
- Dark chocolate should be melted to around 40°C and finished at 31 to 32°C
- Milk chocolate is also melted to 40°C and finished at 31°C
- White chocolate, which contains more cocoa butter, is melted to 40°C and finished at 29°C
These temperatures ensure that the cocoa butter crystallizes correctly, resulting in chocolate that sets evenly, holds its shape, and stores well at room temperature. Whether you're working with couverture chocolate or regular chocolate, following these temperature guidelines during tempering will significantly improve the quality of your final product. In the next sections, we will explore three professional methods for tempering chocolate, each offering a unique approach depending on your equipment and experience.
3 Methods for Tempering Chocolate
While there are several ways to temper chocolate, three methods are widely used for their reliability and consistent results. These techniques focus on melting and finishing the chocolate while promoting the formation of stable beta crystals in the cocoa butter. This process is the foundation of tempering chocolate and ensures that it sets with a smooth shine, crisp texture, and clean snap.
Depending on your equipment, batch size, and comfort level, you can choose the method that best suits your needs. In the sections below, we will explore the double boiler method, the microwave method, and the marble or table top method. Each offers a different approach with its own benefits and learning curve, but all can help you master the art of tempering chocolate with confidence.
Double Boiler Method
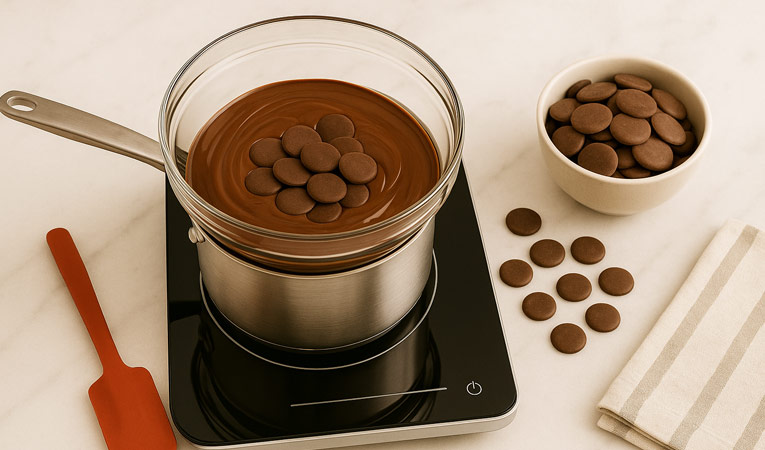
The double boiler method is the most commonly used technique by home bakers and culinary students because it provides gentle, even heat through steam instead of direct flame. It allows for better control during the melting process and reduces the risk of overheating, especially when working with delicate types of chocolate like milk or white. This method is ideal for those who are just starting out with tempering chocolate or prefer a visual, hands-on approach. Most kitchens already have the basic setup needed, such as a saucepan and a heatproof bowl, which makes this method accessible and practical. For small to medium chocolate batches, it consistently delivers reliable results, making it the go-to technique for home-based chocolatiers.
Steps:
- Prepare the Double Boiler: Fill a saucepan with about an inch of water and bring it to a simmer. Place a heatproof bowl on top, making sure it does not touch the water below.
- Melt the Chocolate: Add two-thirds of the chopped chocolate to the bowl and stir continuously until it reaches its melting temperature. For all chocolate types, including dark, milk, and white, the ideal melting temperature is around 40°C.
- Add Remaining Chocolate (Seeding): Remove the bowl from heat. Add the remaining one-third of chopped chocolate and stir continuously. This helps finish the chocolate by bringing it to the correct working temperature. Dark chocolate should finish at 31 to 32°C, milk chocolate at 31°C, and white chocolate at 29°C.
- Maintain the Temperature: If the chocolate begins to cool below its finishing temperature while working, gently return it to the double boiler for a few seconds, stirring constantly to maintain consistency.
- Test the Temper: Dip a spoon or knife into the chocolate and allow it to set at room temperature. Well-tempered chocolate will harden with a uniform, glossy finish and produce a crisp snap when broken.
Microwave Method
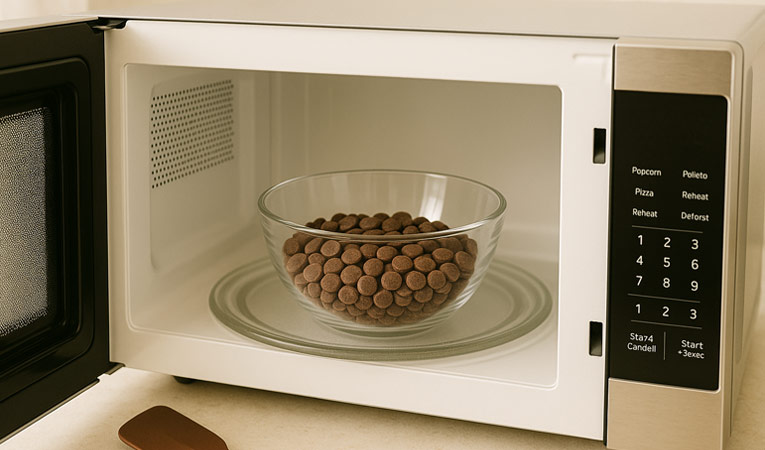
The microwave method is a quick and convenient option, best suited for home bakers and professionals working with smaller quantities of chocolate. It is especially helpful when kitchen space is limited or when you need to prepare tempered chocolate on short notice. While it requires attention to prevent scorching, this method is excellent for tempering chocolate when time is a constraint. It eliminates the need for additional tools or complex setups and is ideal for tasks such as drizzling, dipping, or quick decorations. If you are comfortable using a thermometer and stirring frequently, this technique provides speed without compromising results.
Steps:
- Chop the Chocolate: Finely chop the chocolate to ensure it melts evenly and quickly.
- Initial Melting: Place two-thirds of the chocolate into a microwave-safe bowl. Microwave at 50 percent power in short intervals of 30 seconds. Stir after each interval and continue until the chocolate reaches its melting temperature of 40°C.
- Add Remaining Chocolate (Seeding): Once melted, add the remaining one-third of chocolate. Stir constantly to help finish the chocolate and bring it to the appropriate working temperature. Dark chocolate should be finished at 31 to 32°C, milk chocolate at 31°C, and white chocolate at 29°C.
- Maintain Temperature: If the chocolate begins to thicken, microwave again at low power for 5 seconds at a time. Check the temperature to keep it within the desired finishing range.
- Test the Temper: Dip a spoon or a piece of parchment into the chocolate. Allow it to rest at room temperature. If tempered correctly, it will set quickly with a glossy, streak-free surface and a clean break when snapped.
Marble or Table Top Method
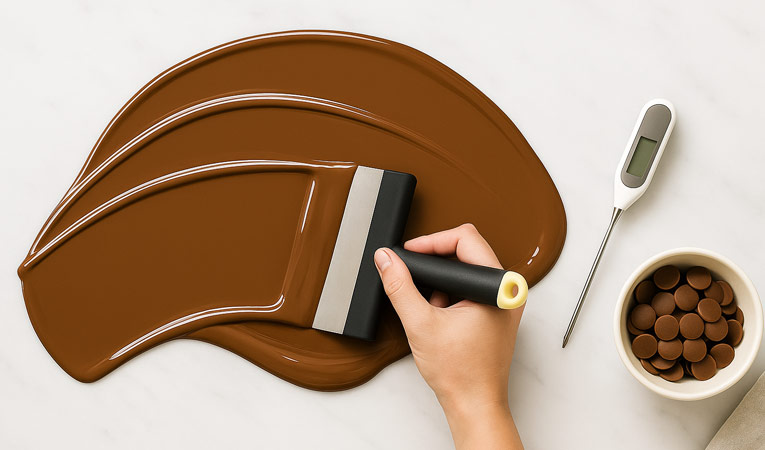
The marble or table top method is a traditional professional technique often used by experienced chocolatiers and pastry chefs. It is well suited for tempering chocolate when working with larger volumes or when a high level of precision is required. This method involves manually working the chocolate on a cool marble surface to help regulate the finishing temperature and promote stable beta crystal formation. Though it requires physical space and more effort, it allows for maximum control over the texture and appearance of the final product. Professionals rely on this method to achieve flawless finishes and consistent quality.
Steps:
- Melt the Chocolate: Begin by melting all of the chocolate to 40°C. You can do this using a double boiler or microwave, whichever is more convenient.
- Pour onto Marble Surface: Transfer about two-thirds of the melted chocolate onto a clean and dry marble or granite slab.
- Finish the Chocolate: Using a chocolate scraper and spatula, continuously spread, fold, and work the chocolate across the surface. This movement encourages cooling and the formation of stable beta crystals. Once the chocolate reaches its finishing temperature, which is 31 to 32°C for dark, 31°C for milk, and 29°C for white, it is ready to use.
- Recombine with Remaining Melted Chocolate: Scoop the finished chocolate from the slab and mix it with the remaining melted chocolate in a bowl. Stir well until the entire batch is uniform in texture and temperature.
- Maintain Temperature: Keep the tempered chocolate within the finishing range as you work with it. Use a heat gun or a short warm bath if necessary to rewarm slightly without overshooting the temperature.
- Test the Temper: Dip a spatula or knife blade into the chocolate and let it set. Properly tempered chocolate will solidify with a rich shine and a satisfying snap.
Each of these tempering chocolate methods offers unique advantages depending on your kitchen setup, skill level, and the quantity of chocolate you are working with. Whether you prefer the reliability of the double boiler, the speed of the microwave, or the precision of the marble surface, mastering one or more of these techniques will significantly improve the quality and appearance of your chocolate creations. With practice and attention to detail, you can consistently achieve smooth, glossy, and professional results that truly stand out.
Choosing the Right Method
With several effective methods available, choosing the right way to temper chocolate depends on your kitchen setup, how much chocolate you're working with, and the level of control you want over the final result. Whether you're a beginner experimenting at home or a seasoned professional looking for consistency, selecting the right technique can save you time, reduce waste, and help you create beautiful, glossy chocolate every time.
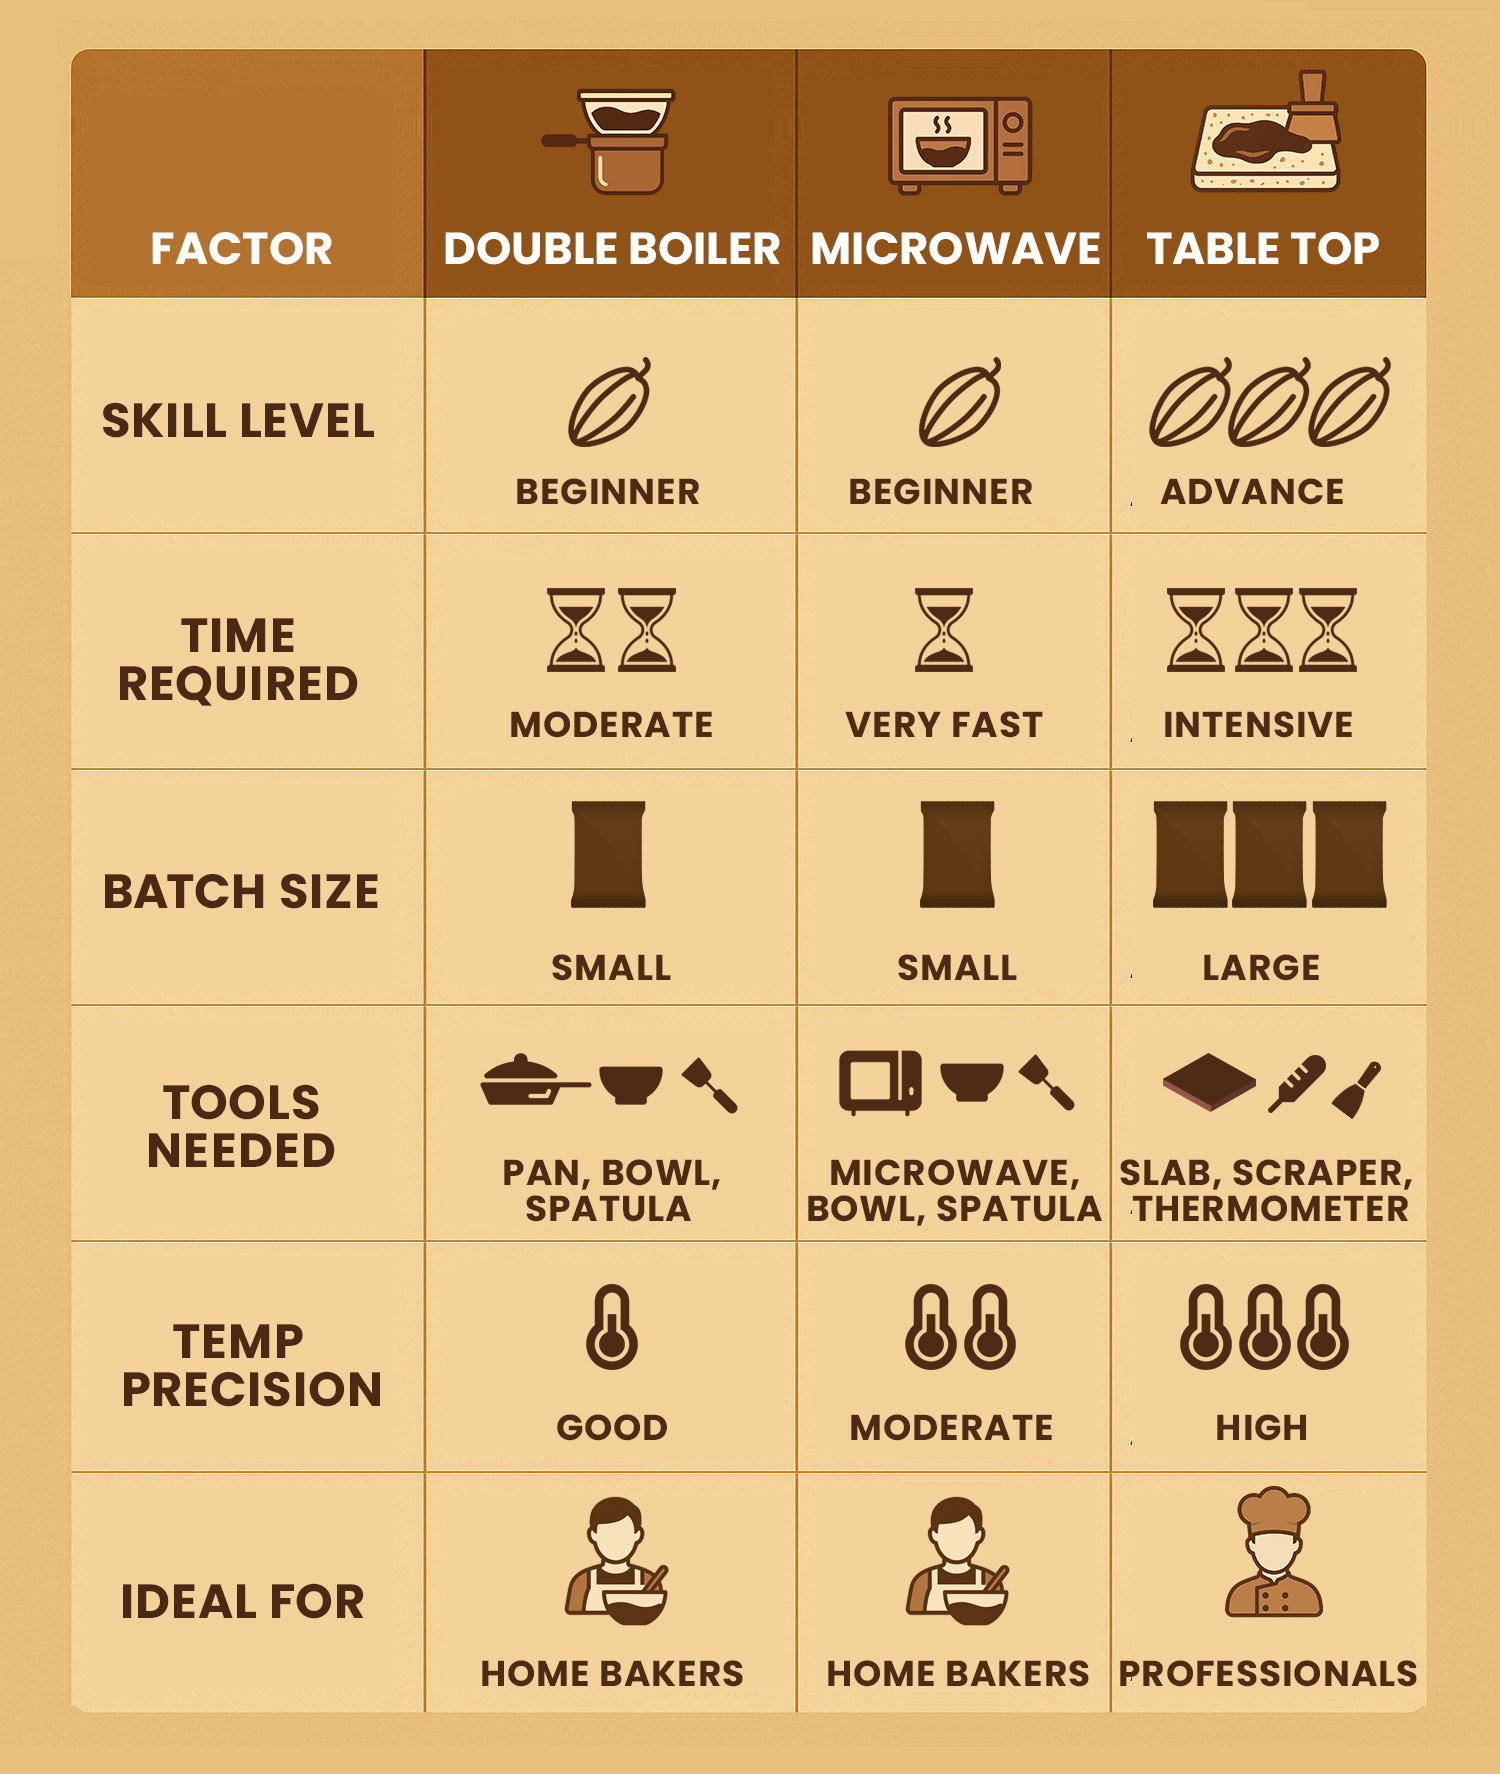
Here is a comparative guide that highlights key factors to help you decide which tempering method suits you best:
| Factor | Double Boiler | Microwave | Marble or Table Top |
|---|---|---|---|
| Skill Level | Beginner | Beginner | Advanced |
| Time Required | Moderate | Very Fast | Time-Intensive |
| Batch Size | Small to Medium | Small | Medium to Large |
| Tools Needed | Saucepan, heatproof bowl, spatula | Microwave, microwave-safe bowl | Marble slab, scraper, thermometer |
| Temperature Precision | Good | Moderate | High |
| Ideal For | Home bakers, controlled melting | Quick tempering, casual use | Professionals, decorative finishing |
This table simplifies your decision-making process by outlining who each method is best suited for, how much chocolate you can handle comfortably, and what kind of equipment you’ll need. If you are just starting out or making smaller batches, the double boiler or microwave method will serve you well. However, if you aim for more precision, high shine, and a clean snap in every batch, the marble method offers unmatched control and finish.
Choosing the right method not only enhances your results but also builds your confidence with chocolate work. Over time, you might even find it helpful to use different methods depending on your project or workflow.
FAQs on Tempering Chocolate
Before we wrap up, here are answers to some of the most frequently asked questions about tempering chocolate. These will help clear up common doubts and ensure more confident chocolate work in your kitchen.
1. Why is tempering chocolate necessary?
Tempering chocolate is essential to ensure it sets with a smooth, glossy surface and a crisp snap. It also helps chocolate hold its shape at room temperature and prevents fat bloom, which appears as white streaks or blotches. Untempered chocolate often looks dull, feels soft, and has a shorter shelf life.
2. Can I skip tempering if I’m just baking with chocolate?
If you are using chocolate inside a batter or ganache, tempering is not required. However, if you are using chocolate as a coating, for molded candies, or for decorations, tempering is strongly recommended to achieve professional-quality results.
3. What is the difference between melted chocolate and tempered chocolate?
Melted chocolate is simply chocolate that has been heated to a liquid state. Tempered chocolate, on the other hand, has been melted and then finished at precise temperatures to encourage the formation of stable beta crystals. This gives it a smooth texture, shine, and structural integrity that melted chocolate alone cannot provide.
4. How do I know if my chocolate is properly tempered?
To test the temper, dip a spoon or knife into the chocolate and let it set at room temperature. If the chocolate hardens quickly, appears shiny, and breaks with a clean snap, it is properly tempered. If it sets with streaks, a grainy texture, or a dull finish, it needs to be tempered again.
5. What type of chocolate is best for tempering?
Couverture chocolate is considered the best for tempering because it contains a higher percentage of cocoa butter, which allows for better crystal formation. While compound chocolate can be used for coating without tempering, it does not offer the same mouthfeel, shine, or finish as properly tempered couverture chocolate.
Conclusion
Tempering chocolate may sound technical, but once you understand the purpose behind it and follow the correct steps, it becomes an indispensable skill in chocolate work. It is the process that gives your chocolate a beautiful shine, smooth texture, and a crisp snap that elevates everything from molded candies to dipped fruits and decorative finishes. Without proper tempering, even high-quality chocolate can end up dull, streaky, or soft, which affects both its appearance and how it performs in confections.
In this blog, we explored three reliable methods for tempering chocolate. The double boiler method is the most popular among home bakers because it is simple, requires only basic tools, and offers good temperature control. The microwave method, while very fast and convenient, is best suited for small batches where time is a constraint. On the other hand, the marble or table top method is perfect for professional chocolatiers who require precision and are working with medium to large volumes of chocolate. Each method can produce beautifully tempered results when followed carefully, with proper temperature monitoring and patience.
Choosing the right method depends on your kitchen setup, experience level, and the type of chocolate project you're working on. With a little practice and the right ingredients, anyone can learn to temper chocolate effectively. It is not just about technique, it is also about working with chocolate that responds well to tempering.
To get the best results, it is important to start with high-quality chocolate. You can explore a wide selection of couverture chocolate at Bakerykart, carefully sourced for professional performance and excellent taste. Whether you are a beginner or an expert, working with premium couverture chocolate will give your creations the shine, snap, and finish that truly stand out.
