Piping Bags 101: A Comprehensive Guide to Types and Applications
29-05-2023

Cake decoration is an art that requires precision and creativity. One of the most essential tools in a baker's arsenal is the piping bag. This versatile tool allows you to create beautiful designs, intricate patterns, and personalized messages on your cakes. Whether you're a professional baker or an enthusiastic home baker, mastering the art of using a piping bag can elevate your cake decoration to the next level. In this blog, we will explore the various types of piping bags, their uses, and provide valuable tips to help you use them effectively for stunning cake designs.
Piping Bag: An Essential Tool for Cake Decoration
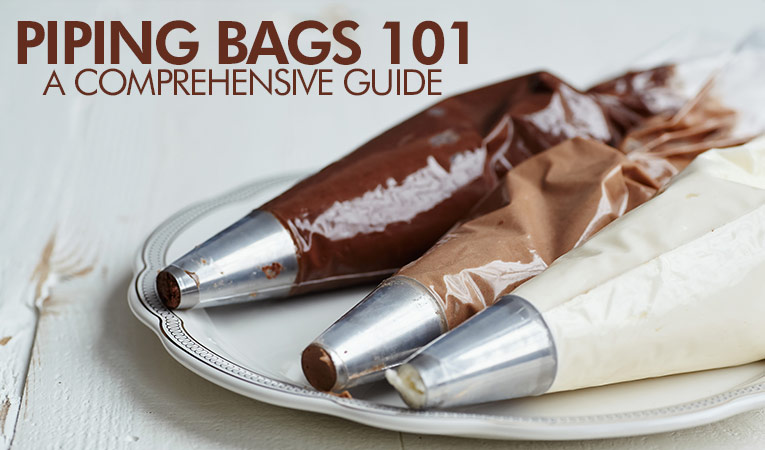
A piping bag is an essential tool used in the art of cake decoration and baking. It is a cone-shaped bag made from materials like cloth, plastic, or silicone. The purpose of a piping bag is to allow bakers and decorators to control the precise application of various mixtures, such as frosting, buttercream, whipped cream, and fillings.
Exploring the Variety of Piping Bags: From Fabric to Disposable
We will explore the different types of piping bags available and discuss their unique features and uses. Understanding these options will help you choose the right piping bag for your specific needs and achieve professional-looking results.
- Disposable Plastic Piping Bags: Disposable plastic piping bags are a popular choice due to their convenience and ease of use. Made from food-grade plastic, they are hygienic and require no cleaning. These bags are perfect for one-time use, saving you time and effort in cleaning up. They are ideal for beginners and casual bakers who prefer a hassle-free decorating experience.
- Reusable Fabric Piping Bags: Reusable fabric piping bags are a sustainable option that offers durability and versatility. Made from high-quality cotton or polyester, these bags are washable and can be used repeatedly. They are available in various sizes and are suitable for both small and large projects. Fabric bags provide a good grip and are favored by professional bakers and decorators who value eco-friendly solutions.
- Silicone Piping Bags: Silicone piping bags are known for their flexibility, control, and durability. These bags are heat-resistant and can withstand high temperatures, making them suitable for hot fillings and melted chocolate. The non-slip surface provides a secure grip and allows for precise piping. Silicone bags are favored by experienced decorators and are a great investment for those who frequently engage in advanced cake decorating techniques.
Choosing the right piping bag depends on your preferences, skill level, and specific project requirements. Consider the type of filling, consistency, and intricacy of the design when selecting a piping bag. It's also helpful to have a variety of sizes on hand to accommodate different designs and piping techniques.
Selecting the Perfect Size: Piping Bags for Every Decorating Need
When it comes to selecting the right size of piping bag for your baking and decorating projects, it's important to consider the amount of mixture you need to pipe and the intricacy of your design. Piping bags are available in small, medium, and large sizes, each serving a specific purpose. Here's a breakdown of each size and when to choose them:
- Small Piping Bags: Small piping bags are perfect for intricate details and precision work. They are typically used for delicate designs that require fine control and accuracy. When working with small piping bags, you can create beautiful and intricate patterns, small flowers, lettering, or precise decorations. These bags are also suitable for piping small amounts of filling or adding intricate finishing touches to your baked goods.
- Medium Piping Bags: Medium-sized piping bags strike a balance between precision and capacity. They are versatile and can handle a wide range of decorating tasks. When using a medium-sized piping bag, you can create borders, rosettes, simple shapes, and medium-sized decorations. These bags are great for piping fillings, such as creams or mousses, and for adding decorative elements to cupcakes, cookies, and cakes.
- Large Piping Bags: If you need to cover larger areas or pipe a significant amount of icing or filling, large piping bags are the way to go. These bags offer a generous capacity and are ideal for filling cake layers, covering cakes with a smooth layer of icing, or creating large decorations like ruffles or piped flowers. They allow for efficient and quick piping, especially when working with bigger batches or larger cakes.
Choosing the right size of piping bag is essential to achieve the desired results in your decorating projects. Consider the amount of mixture you will be using and the level of detail you want to achieve. It's always helpful to have a variety of sizes on hand, as they provide flexibility for different projects and techniques. Experimenting with different sizes will help you find the perfect fit for your specific needs.
Mastering the Art of Using a Piping Bag: A Step-by-Step Guide
Using a piping bag for the first time can seem daunting, but with a little practice and patience, you'll soon master this essential cake decorating tool. Here's a step-by-step guide on how to use a piping bag:
- Prepare your piping bag: Start by selecting a piping bag of your desired size. If you're using a disposable bag, cut the tip of the bag to create an opening. For reusable bags, attach the desired piping tip securely to the bag.
- Fill the bag: Spoon your desired icing or frosting into the bag, making sure not to overfill it. Leaving enough space at the top will allow for better control and prevent the mixture from overflowing.
- Twist and secure: Gently twist the top of the bag to create pressure and keep the icing in place. Use your dominant hand to hold the twisted part while guiding the nozzle with your other hand.
- Test the flow: Before starting, give a gentle squeeze to check the flow of the icing. This helps to ensure that the mixture is evenly distributed and there are no air bubbles trapped inside.
- Apply even pressure: Hold the twisted part of the bag firmly between your thumb and forefinger, applying even pressure to control the flow of the icing. The closer you hold your hand to the nozzle, the more control you'll have over the design.
- Start decorating: Position the nozzle just above the surface you want to pipe onto. Apply steady pressure to create your desired design. Practice different techniques, such as creating borders, rosettes, or writing, to enhance your cake or dessert.
- Clean as you go: If you're using different colors or types of icing, clean the piping bag and nozzle between each use. Simply remove any leftover icing, wash with warm soapy water, and allow them to dry completely before reuse.
Remember, practice makes perfect! Don't be discouraged if your first attempts aren't flawless. With time and experience, you'll develop the skills to create beautiful and professional-looking decorations using a piping bag. So, have fun, experiment, and let your creativity flow!
Quick and Handy Tips for Working with Piping Bags
When working with a piping bag, these quick and small tips can make a big difference in achieving successful results. Here are some handy tips to keep in mind:
- Prepare the piping bag by snipping off the end and inserting a piping tip if desired.
- Use the right consistency of icing or batter for smooth piping.
- Apply steady and consistent pressure while squeezing the bag to control the flow.
- Practice piping techniques on a flat surface before decorating your cakes or cupcakes.
- Hold the piping bag upright for cleaner lines.
- Keep your hand steady while piping to ensure even decorations.
- Use a turntable or rest your hand on a surface for better stability.
- Use a cloth or rubber band to secure the top of the bag for easier control.
- If using Fabric Bag, clean the piping bag thoroughly after each use to prevent clogs.
- Experiment with different piping tips to create a variety of designs.
By following these small tips, you'll be able to enhance your piping skills and create beautifully decorated treats with ease. Happy piping!
Conclusion:
We hope this beginner's guide to using a piping bag has inspired you to explore the world of cake decorating. Remember to start with basic designs and gradually advance your skills. Don't hesitate to experiment with different piping techniques and designs to create unique and beautiful cakes and pastries. If you have any questions or need further guidance, feel free to leave a comment below. Happy piping!


