

Cake Tin Guide: Types, Sizes, Uses and Baking Tips
23-07-2025

Selecting the right cake tin is one of the most important choices a baker can make when preparing any recipe. Whether you are baking a classic sponge, a layered birthday cake, or a rich fruit base, the performance of your tin directly affects rise, shape, and texture. A properly chosen tin supports even baking and clean release, helping you achieve results that are both beautiful and consistent.
The shape and size of your baking tin influence how the batter cooks from edge to center. A tin that is too large may cause the cake to bake flat and dry, while one that is too small may lead to uneven rise or overflowing. Material also plays a major role. Aluminum, stainless steel, cast aluminum, silicone, and ceramic all offer different benefits depending on the cake type and baking method.
Many baking issues stem from incorrect tin choices, such as cracked tops, soggy centers, and sticking during release. Understanding how tin dimensions relate to batter volume, how each shape functions, and how different materials perform under heat will help you make confident, informed decisions in your baking process. With the right guidance, you can avoid trial and error and enjoy reliable results.
In this detailed guide, you will explore the most popular cake tin types, learn which sizes are best for specific cakes, discover how to prepare and care for your tins, and understand how to prevent common baking faults. Whether you are baking occasionally at home or producing cakes professionally, the insights in this guide will help you choose with clarity and bake with precision.
Materials Used in Cake Tins and Their Baking Impact
The material of a cake tin plays a critical role in the way heat is conducted and retained during baking. It influences browning, rise, crust texture, and overall consistency. From traditional aluminum to flexible silicone, understanding the properties of each type helps you make informed choices based on the type of cake you want to bake.
Below are the most commonly used materials in cake tins and how they perform during baking.
- Aluminum - Aluminum is one of the most widely used materials for cake pans. It heats up quickly and distributes heat evenly, making it ideal for delicate sponges and everyday bakes. Lightweight and affordable, aluminum tins promote a golden crust and consistent rise. However, they can react with acidic ingredients if uncoated. Always grease and line the tin properly to prevent sticking and protect the surface from stains or flavor transfer.
- Cast Aluminum - Cast aluminum is thicker and more durable than standard aluminum. It offers exceptional heat retention and detailed baking results, especially in decorative or Bundt pans. These tins often come with non-stick coatings that simplify unmoulding. Cast aluminum tins are ideal for pound cakes, butter cakes, and other dense batters. Their weight also helps prevent warping, ensuring consistent results across multiple uses and recipes.
- Stainless Steel - Stainless steel tins are durable and resistant to warping or rusting. They do not conduct heat as quickly as aluminum, so baking time may need to be adjusted. These tins are well-suited for dense batters or cakes that require long baking times. They are less prone to surface discoloration and typically last longer with proper care. Use them with evenly mixed batters to avoid underbaked centers or uneven edges.
- Silicone - Silicone cake moulds are flexible, non-stick, and easy to handle. They are perfect for mousse cakes, chilled desserts, and novelty shapes that require intricate details. While they do not brown cakes as well as metal tins, their ease of release is unmatched. Silicone is also dishwasher-safe and easy to store. Use it for recipes where color and crust texture are not the primary concern but where presentation matters.
- Glass and Ceramic - Glass and ceramic tins provide excellent heat retention but heat up more slowly. They are ideal for slow-baking recipes like fruit cakes and puddings. These materials often double as serveware due to their elegant appearance. Bakers should reduce oven temperature slightly when using these tins to avoid overbrowning. Always grease thoroughly to prevent sticking, especially in cakes with sugar or syrup-heavy batters.
Understanding the characteristics of each material allows you to choose a cake tin that aligns with your recipe requirements. The right combination of tin and batter not only improves texture but also enhances your overall baking experience by reducing the chance of underbaking, sticking, or uneven rise.
Most Popular Shapes and Their Baking Applications
The shape of a cake tin is more than a design choice. It directly affects how the cake cooks, rises, and presents. Some shapes are better suited for layered cakes, while others support detailed moulds or individual portions. Choosing the correct shape not only enhances the visual appeal but also ensures even baking and easy slicing.
Here are the most common cake tin shapes and when to use them in your baking projects.
- Round - The round cake mould is a versatile classic. It is commonly used for layered cakes, birthday cakes, and wedding tiers. Round tins allow even heat circulation, promoting a uniform rise and a balanced crumb. They are available in varying depths and diameters, making them suitable for both light sponges and dense butter cakes. Their smooth curves also make frosting and stacking easier during assembly and decoration.
- Square - Square tins are ideal for brownies, bar cakes, or cakes that require sharp corners for clean slicing. They are especially useful when you need equal-sized servings for events or packaging. Square shapes help maximize oven space and often allow quicker baking because of the corner-to-center heat distribution. They also provide a modern finish that works well with minimalist cake designs or fondant coverage.
- Rectangular - Rectangular cake tins are best suited for slab cakes, birthday sheet cakes, and cakes that will be shaped or carved. The extended surface area is perfect for serving larger groups or for applying intricate icing designs. These tins are often used in professional kitchens where consistency and high output are required. Their flat base and straight edges help in achieving an even bake and smooth slicing.
- Loaf - Loaf tins are a staple for tea cakes, banana bread, and quick breads. Their narrow, elongated form helps control the direction of rise, producing a domed top and firm sides. Loaf tins are also great for layered ice cream cakes and no-bake desserts. Their compact design allows for easy storage and quick cooling. This shape ensures that the cake sets properly from edge to center without overbaking.
- Bundt and Ring - Bundt and ring-shaped tins are designed with a central tube, allowing heat to reach the middle of dense batters. They are ideal for rich cakes that benefit from a slow, even bake. The decorative exterior creates intricate patterns without the need for additional decoration. Bundt tins are typically made of cast aluminum and require thorough greasing to release the cake cleanly and preserve every ridge and detail.
Each shape serves a unique purpose and choosing the correct one depends on your recipe, portioning needs, and presentation goals. A well-matched cake pan shape ensures consistency in texture and structure, helping bakers achieve professional-looking results every time.
Cake Tin Sizes Explained with Baking Quantity Conversion
Selecting the correct size of cake tin is essential for uniform rise, even baking, and proper crumb structure. If the tin is too small, the batter may overflow or bake unevenly. If it is too large, the cake may bake flat and dry. Matching the volume of the batter with the right tin size improves not only the texture but also the overall presentation and slicing precision.
Every recipe requires a certain volume to rise and set properly. Understanding how much batter your tin can hold helps scale recipes accurately and prevents undercooked centers or burnt edges. This is particularly important when you are scaling recipes for events, creating tiered cakes, or using high-fat or delicate sponges.
The right size tin allows your batter to expand naturally during baking without overflowing or collapsing. It also helps maintain even heat throughout the cake, which is key to consistent results in both home and commercial kitchens.
Use the table below as a reliable reference when selecting a cake tin based on your required sponge weight and cake volume.
| Cake Tin Diameter | Approx. Batter Volume | Ideal Sponge Weight | Recommended Use |
|---|---|---|---|
| 4 inches | 250 to 300 ml | 250 grams | Mini cakes, test bakes, small layered desserts |
| 6 inches | 400 to 500 ml | 500 grams | Half kg sponge, small celebration cakes |
| 7 inches | 600 to 700 ml | 650 grams | Basic layered cakes, single-tier family cakes |
| 8 inches | 750 to 900 ml | 1 kg | Standard birthday cakes, mousse cakes |
| 9 inches | 900 to 1100 ml | 1.25 kg | Multi-layer cakes, rich butter cakes |
| 10 inches | 1100 to 1300 ml | 1.5 kg | Wedding cake tiers, party servings |
| 12 inches | 1500 to 1800 ml | 2 kg | Large celebration cakes, slicing cakes |
| Rectangle 9 x 13 inches | 1800 to 2200 ml | 2.25 kg | Sheet cakes, layered slab cakes, sponge bases |
Choosing the right cake tin pan improves not only baking precision but also time efficiency and visual consistency. It is a simple yet impactful step that ensures better results, especially when preparing cakes for events or commercial orders.
How to Prepare a Cake Tin Before Baking?
Preparing your cake tin properly is an essential part of the baking process. It helps prevent sticking, promotes even cooking, and ensures a smooth release after baking. Skipping this step often leads to cracked surfaces, torn layers, or residue left behind in the tin. Whether you are baking with metal, silicone, or glass, a few simple steps will make a noticeable difference in the final outcome.
Follow these preparation techniques to get your cake tin ready for consistent and clean baking results.
- Select the Correct Tin Based on the Recipe - Begin by choosing a baking tin that fits the recipe volume and shape. A mismatch can result in overflow or uneven baking. For sponge or layered cakes, use straight-sided round tins. For dense recipes like fruit cakes or butter cakes, choose tins that support slow, even heat distribution. Always check that the tin is clean and damage-free before starting the preparation.
- Grease the Tin Evenly Using a Brush or Paper Towel - Apply a thin, uniform layer of butter or neutral oil to the base and sides of the tin. Use a pastry brush or folded kitchen towel to reach all corners and edges. This step helps prevent sticking, especially in shaped or patterned tins. Avoid over-greasing, as excess fat can cause uneven browning or greasy spots along the cake’s crust.
- Line the Base with Baking Paper for Extra Protection - Cut a parchment paper round or rectangle to match the base of the cake mould. This lining provides an added barrier and supports an easy release after baking. It is especially helpful for delicate sponges and rich cakes with high sugar or butter content. For taller cakes, consider lining the sides as well to protect against crusting and help guide the cake’s vertical rise.
- Lightly Dust with Flour or Cocoa Powder if Needed - After greasing and lining, a light dusting of flour or cocoa powder improves non-stick performance. Tap the tin gently to distribute the dusting and discard the excess. This method works well for chocolate cakes or batters with high moisture content. It also creates a micro barrier that helps the crust form cleanly and prevents the batter from clinging to the tin surface.
A properly prepared cake pan enhances the quality of your bake, reduces the risk of structural damage, and speeds up the unmoulding process. These simple yet effective steps ensure your cakes release with minimal effort and maintain their intended shape and texture.
Cake Tin Usage Tips for Professional Results
Knowing how to use a cake tin correctly is just as important as selecting the right one. Professional results come from small refinements in how you handle batter, place tins in the oven, and manage heat. These techniques help prevent common issues like uneven rise, cracked tops, or underbaked centers. Following best practices ensures consistency, improves presentation, and reduces waste.
Here are expert-approved cake tin usage tips to improve your baking outcome.
- Preheat the Oven to Ensure Stable Temperature - Always preheat your oven fully before placing the tin inside. This stabilizes the baking environment and allows the batter to set properly from the start. Without a preheated oven, the batter may rise unevenly or develop a coarse texture. Use an oven thermometer for accuracy, especially when baking recipes that require precision in rise, structure, or browning.
- Fill the Tin to Two Thirds of Its Depth - To avoid overflowing or sinking, fill the tin no more than two thirds full. This gives the batter room to expand while baking. Overfilled tins may collapse at the center or result in undercooked portions. Underfilled tins may dry out or fail to form a proper dome. Always measure your batter and spread it evenly before placing it in the oven.
- Position the Tin on the Middle Rack - Placing the baking tin on the middle rack helps ensure even heat circulation. If placed too close to the top or bottom, the cake may brown too fast or remain raw in the center. The middle rack allows consistent exposure to surrounding heat. When using more than one tin, space them apart to allow airflow between each for even baking.
- Avoid Opening the Oven Frequently During Baking - Keep the oven door closed for at least the first 20 minutes of baking. Opening the door releases heat and disrupts the internal environment, which can cause your cake to sink or crack. Check progress only through the oven window or interior light. If rotation is required, do it gently and quickly once the structure is set.
- Allow Proper Cooling Before Unmoulding the Cake - After baking, let the cake cool in the tin for about 10 minutes. This resting time helps set the crumb and makes unmoulding easier. Removing the cake too soon may cause it to break, while leaving it too long may lead to condensation. Run a palette knife around the edges before turning the cake out onto a wire rack.
Applying these usage tips alongside the correct tin selection improves both texture and finish. Professional baking is not just about recipes but also about technique. With a well-prepared tin and mindful handling, your bakes will consistently reflect high-quality results.
Cleaning and Maintenance Guide for Cake Tins
Cleaning your cake tin the right way ensures it remains in top condition and performs reliably bake after bake. Regular maintenance not only extends the life of your bakeware but also prevents issues like residue buildup, rust, or surface damage. Each material may require specific care, but consistent post-use cleaning practices make a significant difference in performance and hygiene.
Follow these maintenance tips to preserve your cake tin and improve your baking routine.
- Let the Tin Cool Completely Before Cleaning - Allow the cake pan to cool to room temperature before washing. Exposing a hot tin to cold water can cause warping or weaken non-stick coatings. Cooling the tin first helps retain its shape and finish. It also reduces the risk of burns and makes any baked-on residue easier to clean without scrubbing too hard or damaging the surface.
- Wash with Mild Soap and Soft Sponges Only - Use warm water, gentle dish soap, and a soft sponge to clean your cake mould. Avoid abrasive scrubbers or steel wool, especially on non-stick or coated tins. These tools can strip protective layers and cause scratches that affect baking performance. For stubborn bits, soak the tin in warm soapy water for a few minutes before wiping clean.
- Dry Thoroughly After Washing to Prevent Rust - Once washed, dry the tin completely using a clean, lint-free towel. Avoid air drying, especially in humid kitchens, as water spots or rust may form on metal surfaces. For steel or aluminum tins, this step is essential to prevent corrosion. Proper drying also prevents moisture from weakening silicone or composite edges and extends the lifespan of the tin.
- Avoid Stacking Tins Without a Protective Layer - If you store multiple tins together, place a layer of parchment, cloth, or paper towel between each to prevent scratches. Direct contact can lead to dents or chipping, especially in non-stick and decorative moulds. Storing tins properly keeps their surfaces smooth and ready for baking without affecting release performance or visual presentation.
Taking care of your cake tin ensures better baking results and reduces replacement costs over time. A well-maintained tin delivers consistent heat, clean edges, and smooth unmoulding. With a few mindful habits after every bake, your tins can remain reliable, durable, and ready for your next recipe.
Top 10 Cake Tins Every Home Baker Should Own
A well-rounded baking setup is incomplete without the right cake tin selection. Whether you are baking for family, preparing custom orders, or testing new recipes, having a mix of functional and decorative tins helps expand your creativity and consistency. Below are ten highly recommended tins from Bakerykart that deliver reliable results and professional-grade presentation.
-
Wavy Ridge Cast Aluminum Bundt Pan
This elegant cast aluminum tin features dramatic ridges that create a sculpted finish on your cakes. It offers superior heat distribution and a non-stick coating for clean unmoulding. Perfect for dense batters like butter cake or spiced bakes, this bundt tin combines functionality and style. Ideal for gifting or events, it turns every bake into a centrepiece with minimal decoration required.
-
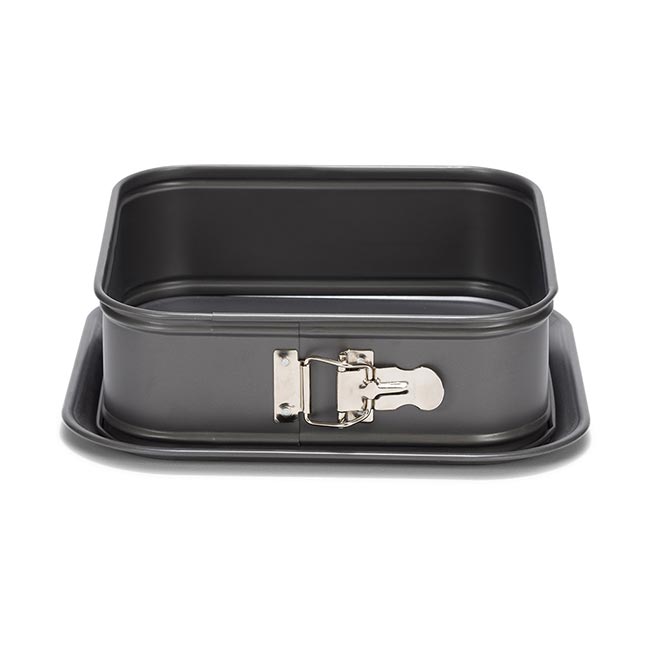
Square Springform Pan 24 Cm
This square springform pan provides both convenience and precision for layered cheesecakes or savoury bakes. Its ceramic-reinforced non-stick coating allows easy release and cleaner slices. The secure latch system simplifies unmoulding, especially for delicate recipes. The 24 cm size is ideal for medium celebrations or multi-layer cakes. This pan is a must-have for bakers seeking both function and elegance in one durable tin.
-
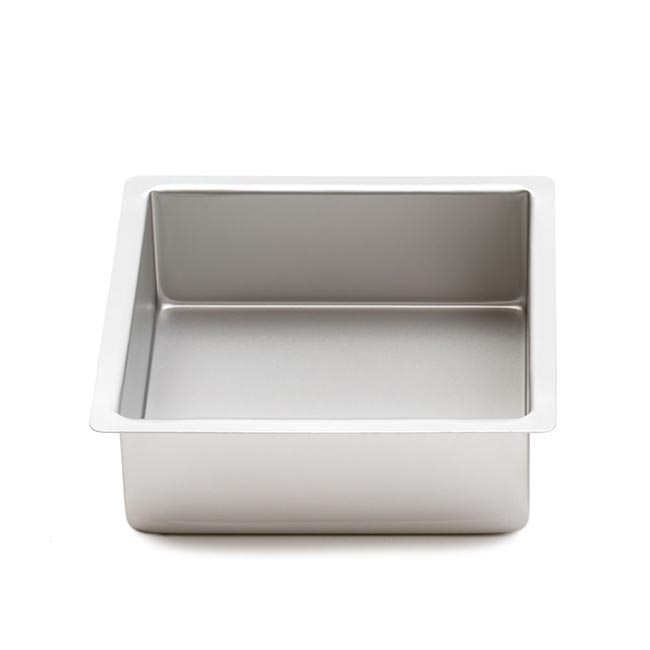
Aluminum Square Baking Pans 10 to 20 Cms
This set of aluminum square baking pans offers versatility in sizes, making it perfect for portion-controlled cakes or layered bakes. Made from high-quality anodized aluminum, these tins distribute heat evenly and are easy to clean. Their straight sides support uniform rise and defined corners. Whether you are baking bar cakes, layered mousse, or savoury bakes, this set covers multiple baking needs efficiently.
-
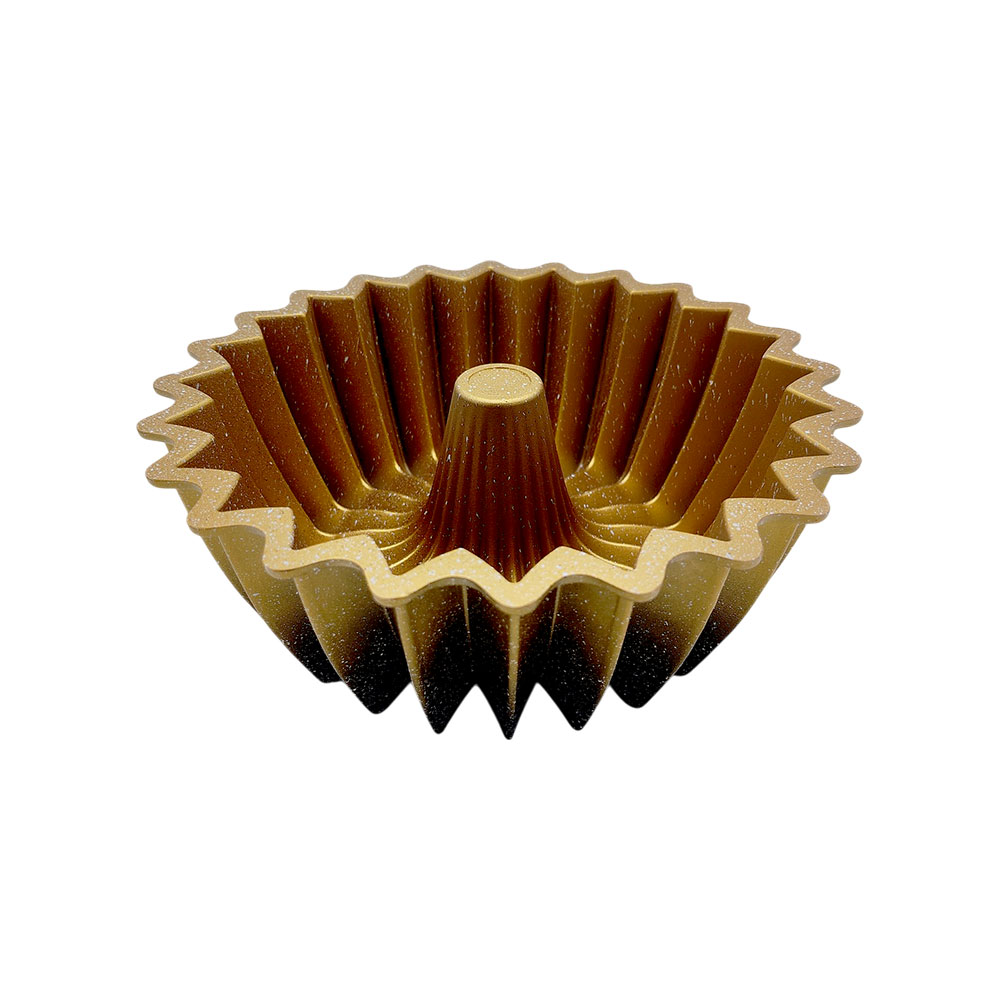
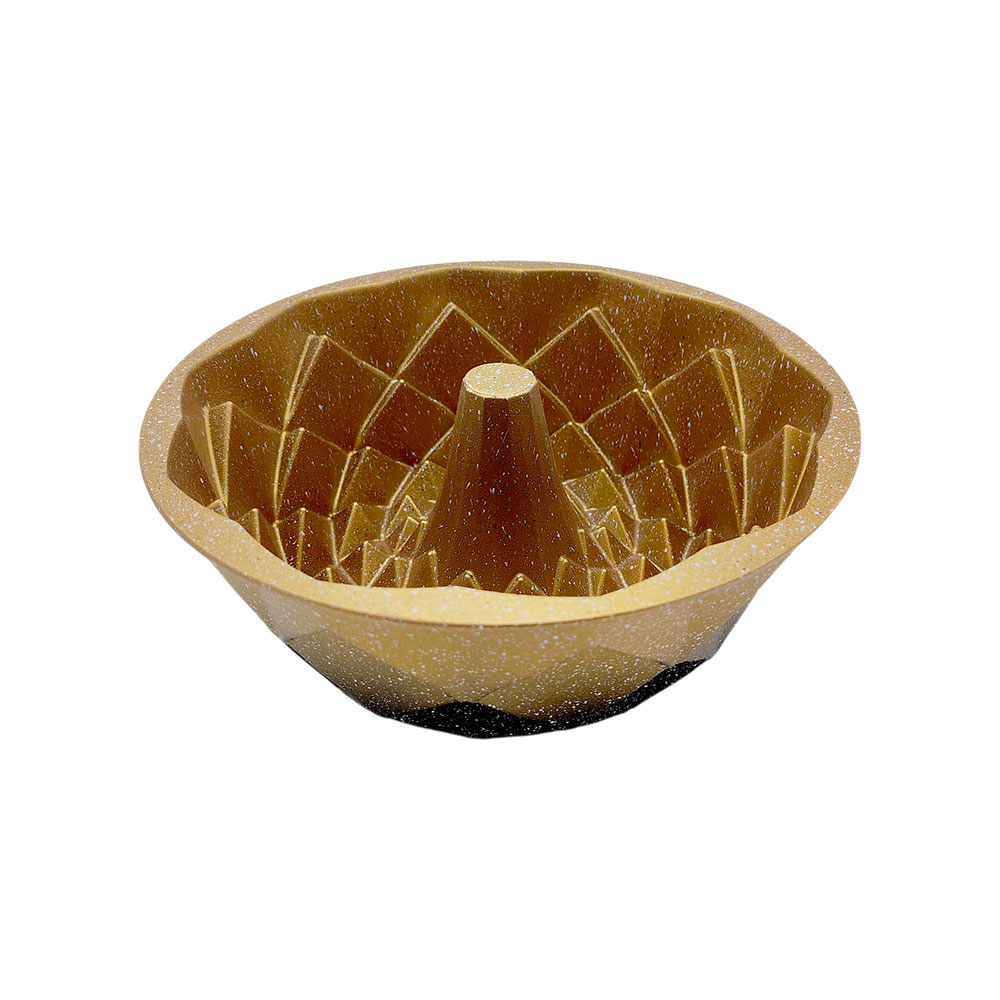
Geometric Crown Cast Aluminum Pan
This geometric cake tin delivers sharp, crown-like contours that make it perfect for premium celebration cakes. Crafted from cast aluminum, it ensures even baking and detailed surface definition. The non-stick interior guarantees smooth release. It is especially well-suited for rich pound cakes and marble batters where form and shape are key to presentation. This mould brings visual drama to simple flavours with ease.
-

Happy Birthday KE096S Cake Mould
This silicone mould by Pavoni features a built-in Happy Birthday message for effortless themed cakes. Perfect for mousse, ice cream, or sponge cakes, it offers easy release and intricate detail without the need for extra decoration. Use it for birthday celebrations or custom orders that require a professional yet playful finish. It adds charm and convenience to your cake presentation effortlessly.
-
Ornate Diamond Cast Aluminum Pan
This premium cast aluminum tin features a stunning faceted diamond design that delivers bakery-style presentation with minimal effort. Its thick structure supports even heat flow while the non-stick interior ensures easy unmoulding. Ideal for rich, decorative cakes that need sharp form and clean edges. Whether for weddings, anniversaries, or gifts, this pan adds elegance and function to your bakeware collection.
-
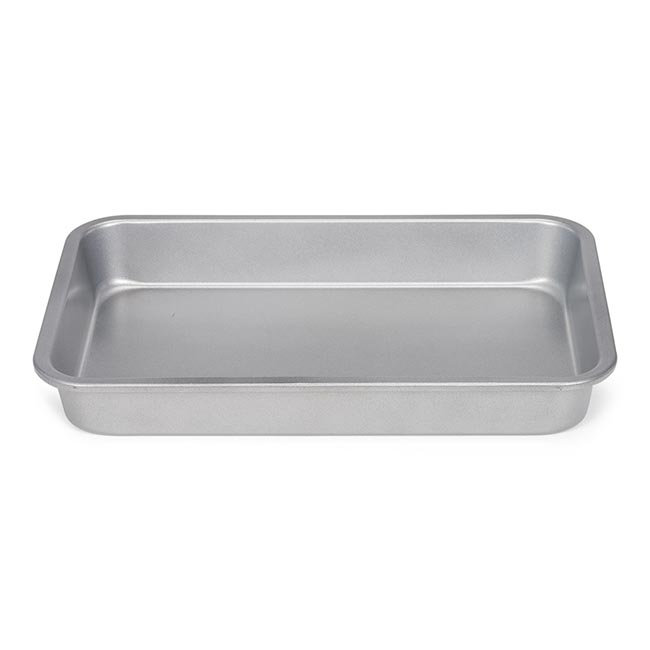
Brownie Pan 28 x 18 Cms
This rectangular brownie tin is perfect for baking fudgy brownies, lemon bars, or sponge slabs. The shallow design promotes even heat distribution, ensuring no soggy centers or burnt edges. Its non-stick finish allows for clean slicing and effortless serving. This tin is a great choice for batch baking, party desserts, or compact cakes that require neat presentation and consistent texture across all slices.
-
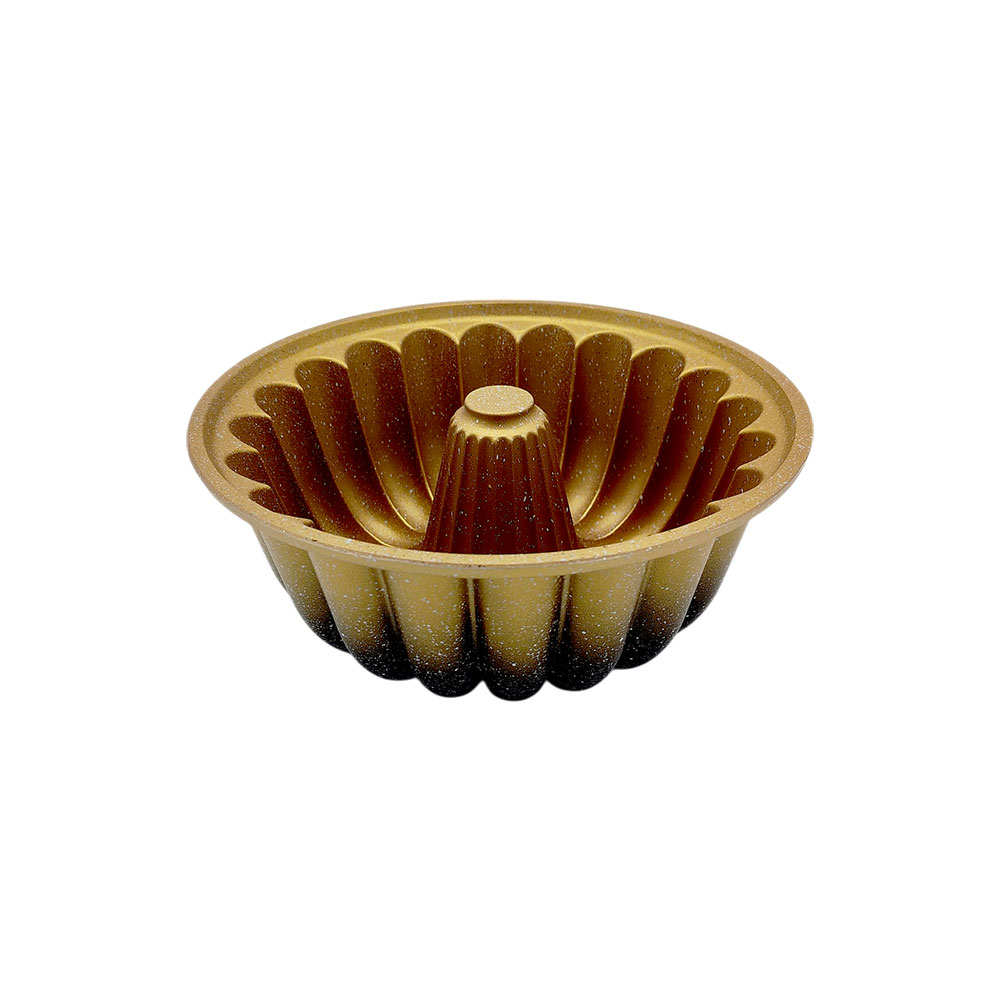
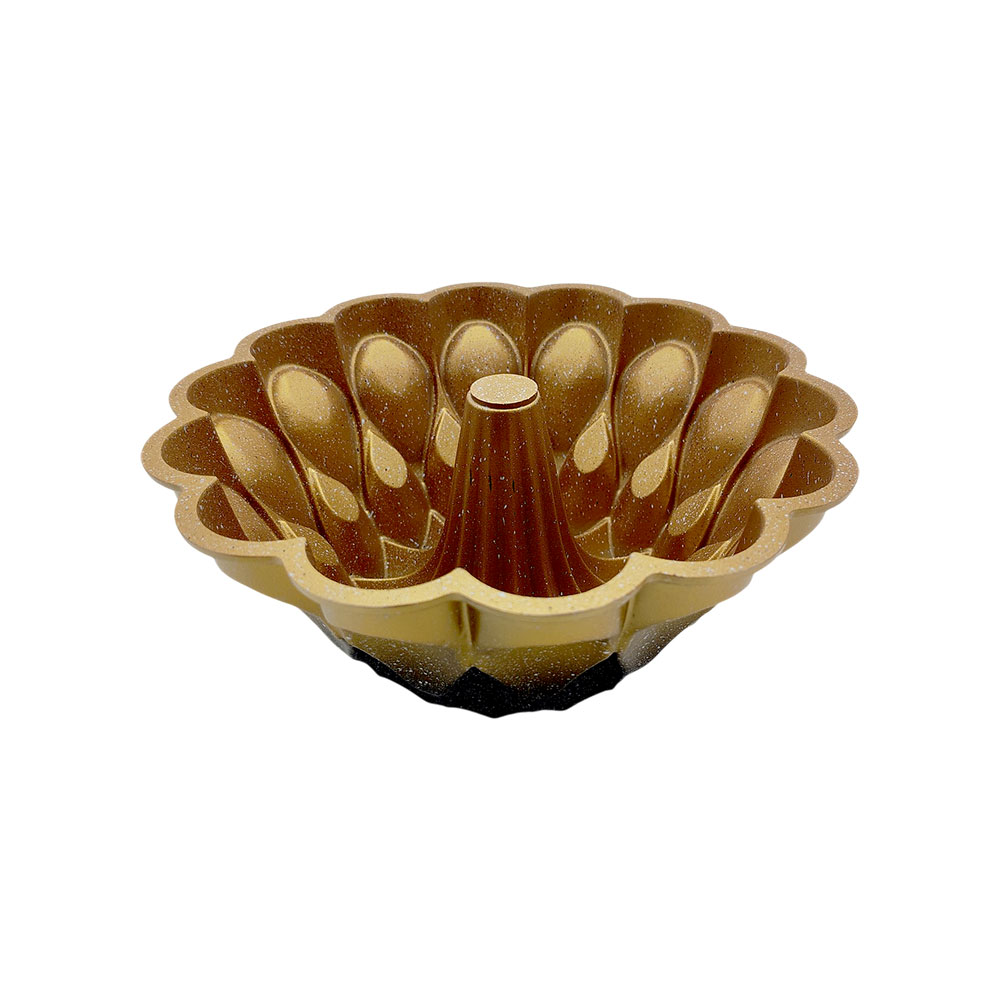
Fluted Cast Aluminum Bundt Pan
This fluted bundt pan offers graceful curves that give any cake an elegant finish. Crafted from cast aluminum, it provides superior heat control for dense batters. The non-stick surface supports perfect release even for highly detailed moulds. Use it for lemon cakes, rum cakes, or spiced cakes that need both structure and aesthetic appeal. It is a timeless addition to your bakeware essentials.
-

Springform Pan with Ceramic Coat Dia 22 Cm
This springform cake tin features a high-performance ceramic-reinforced non-stick surface for clean unmoulding. Its secure locking mechanism is ideal for fragile desserts like cheesecakes or chilled mousse cakes. The 22 cm diameter is perfect for medium bakes or celebration cakes. Built for convenience and performance, this tin supports smooth edges, even baking, and quick release, all with easy maintenance.
-

Square Groove Cast Aluminum Pan
Featuring deep grooves and square symmetry, this cast aluminum pan offers dramatic visual impact for any occasion. The heavy-duty construction ensures consistent browning and rise. Its non-stick coating simplifies release while preserving clean lines in the final presentation. Ideal for coffee cakes, fruit cakes, or custom recipe testing, this mould helps bakers create eye-catching results with ease and reliability.
Common Cake Baking Issues Related to Tins
Using the correct cake tin is vital to achieving a well-risen, evenly baked, and visually appealing cake. When the size, material, or preparation is not aligned with the recipe, several baking issues can occur. These may result in inconsistent texture, loss of shape, or incomplete baking. Identifying the most frequent problems helps bakers take the right corrective steps.
Here are common baking issues caused by improper use or selection of cake tins.
- Cake Bakes Unevenly from Edge to Center - This issue often occurs when a tin that is too large or thin is used. The edges bake faster than the center, leaving the middle undercooked. A light tin or shallow pan may also lead to overbrowning. To resolve this, use the correct tin size and place it in the center rack. Matching your batter quantity to the right tin depth supports even heat flow.
- Batter Spills Over While Baking - Overflow is a result of filling the tin beyond the ideal level. Most cake recipes rise during baking and need enough vertical space. When the tin is too small or overfilled, the batter escapes, creating a mess and uneven layers. To prevent this, fill the tin only two thirds full. Use a measuring cup to portion accurately and allow enough room for proper expansion.
- Cake Cracks or Rises Too Fast - When a cake rises too quickly, it can crack at the top or dome excessively. This usually happens when the oven is too hot or the tin is too close to the upper heating element. To fix this, lower the temperature slightly and use a heavier material that distributes heat evenly. Avoid opening the oven early to maintain stable internal heat.
- Cake Sticks to the Tin and Tears on Release - Sticking can happen when the tin is not greased or lined properly. It often causes damage when unmoulding, especially in detailed tins. To avoid this, line the base with parchment paper and lightly grease the sides. Allow the cake to cool slightly before releasing. This helps maintain clean edges and preserves the structure, especially in soft or high-moisture sponges.
Understanding how cake pan characteristics affect baking outcomes helps you avoid these common issues. With proper sizing, material selection, and preparation, you can consistently produce flawless cakes that bake evenly, release cleanly, and hold their intended form.
Expert Tips to Select the Right Cake Tin for Your Recipe
Choosing the right cake tin is more than matching a shape to a recipe. The decision influences texture, rise, baking time, and final presentation. A tin that suits one cake may not work well for another, depending on moisture content, baking speed, or design. Selecting the correct tin helps you bake more confidently and consistently across a variety of recipes.
Here are expert tips to help you choose the best cake tin for your baking goals.
- Match Tin Size with the Batter Volume - Always check your batter quantity before choosing the tin. A tin that is too large may result in flat cakes, while a small tin can cause overflow or underbaking. Fill the tin to about two thirds of its height. If you are adjusting recipe quantities, use a volume-based conversion chart to ensure the batter fits your selected size accurately.
- Choose the Tin Shape Based on Presentation Style - Round tins are ideal for layered and frosted cakes, while square or rectangle tins offer clean edges and easier portioning. Bundt and decorative tins are better for simple glazes or no-frost designs. Consider how the cake will be served or displayed. Matching shape to occasion and design makes decoration easier and improves the overall visual impact of the final bake.
- Use the Right Material for the Cake Type - Different recipes bake better in different tin materials. Light sponges perform well in aluminum or non-stick tins, while dense batters benefit from cast aluminum or stainless steel. Silicone tins work best for mousse, chilled cakes, or recipes that require detailed shaping. The right material improves texture, supports proper rise, and ensures a smooth release after baking.
- Ensure the Tin Fits Properly in Your Oven - Oversized tins placed too close to heating elements can cause uneven baking, especially in smaller ovens. Always measure your oven interior and allow space around the tin for proper airflow. If using multiple tins at once, ensure they are spaced apart evenly. Proper placement prevents hot spots, improves baking performance, and reduces the chance of one side overbaking.
Knowing how to select the correct cake mould helps you improve structure, visual appeal, and flavor consistency. These small adjustments contribute to better control over every recipe and lead to successful results with less trial and error in the kitchen.
Frequently Asked Questions About Cake Tins
Selecting, using, and maintaining the right tin can raise many questions, especially for home bakers exploring new techniques or transitioning to professional-level baking. Understanding the answers to these common queries will help you make confident decisions and avoid unnecessary mistakes in the kitchen.
Here are frequently asked questions that cover cake tin selection, preparation, and performance.
- Can I use a different size tin than what the recipe recommends?
Yes, you can use a different size tin, but you will need to adjust the baking time and possibly the temperature. A larger tin will spread the batter thinner, resulting in faster baking and a flatter cake. A smaller tin will need more time and may rise higher. Always ensure the batter volume matches the new tin’s capacity and keep an eye on baking progress. - What is the best way to prevent a cake from sticking to the tin?
To prevent sticking, always grease the sides of the tin with butter or oil and line the base with parchment paper. For detailed tins or moulds with ridges, use a brush to reach crevices and consider dusting lightly with flour or cocoa powder. Allow the cake to cool slightly before unmoulding to maintain structure and ensure a clean release without tearing or surface damage. - Can I substitute glass or ceramic tins for metal ones?
Glass and ceramic tins can be used, but they heat up more slowly than metal, which may require extended baking times. They are better for slow-bake recipes like fruit cakes or puddings. Reduce the oven temperature slightly and monitor closely when using them. For light, quick bakes such as sponge cakes, metal tins provide better heat transfer and more even rise. - Why does my cake crack or dome too much during baking?
Cracks or doming typically happen when the oven is too hot or the batter is too deep in the tin. The top sets quickly while the inside continues to expand. To fix this, lower the oven temperature slightly and bake on the center rack. Always use the correct tin size for your recipe and avoid overfilling to ensure balanced rising from edge to center. - How long should I let the cake rest before unmoulding?
Letting the cake rest in the tin for 8 to 10 minutes after baking helps it set and reduces breakage. This short cooling period allows the structure to stabilize, making it easier to unmould cleanly. Use a knife to gently loosen the edges, especially for sponge or high-moisture cakes. Transferring the cake too early may cause cracks or loss of shape.
Understanding the fundamentals of cake pan use helps eliminate common frustrations and improves baking outcomes. These answers offer clarity on everyday concerns and support better decision-making at every stage of your baking process.
Conclusion
Choosing the right cake tin is a small yet powerful decision that can transform your baking experience. From selecting the right size and shape to understanding materials and handling techniques, every detail adds to the outcome of your recipe. Whether you are baking a celebration cake, a simple sponge, or experimenting with decorative moulds, the right tin provides the foundation for texture, height, and presentation.
Throughout this guide, you have learned how cake tin materials impact baking, which shapes suit different occasions, and how to match batter volume to tin capacity. You also explored common issues and how to prevent them using the correct tin size and placement. From springform pans to cast aluminum bundt moulds, knowing how to select and use your tins properly helps you achieve even baking, clean release, and professional results at home.
With the right preparation, usage, and care, your tins become more than just tools—they become trusted allies in your baking process. At Bakerykart, you will find a curated collection of cake moulds and bakeware that support both beginner and expert bakers. Whether you want precision, durability, or elegant presentation, we have the perfect solution for your next recipe.
Visit the cake moulds section on Bakerykart to explore premium tins that match your baking needs. With expert guidance, high-quality products, and a passion for excellence, you are now ready to bake with confidence, clarity, and creativity.

Related Blog to Follow
Are you still looking for more interesting tips and idea on baking, lovely just follow our blog.
-

17-07-2025
Banneton Basket for Sourdough
Master the art of sourdough with this complete guide on Banneton baskets, featuring tips, care instructions, top product....
View Detail -

01-11-2023
Icing Tips 101: Types, Uses, and Tips for Bakers
Discover icing tips: types, uses, and expert tips for cake decorating in this comprehensive guide....
View Detail -

20-07-2023
Zero-Waste Baking: Tips for Minimizing Waste in the Kitchen
Master the art of zero-waste baking with eco-friendly tips and techniques for a greener, sustainable kitchen.....
View Detail